Categories
Blog

When Does a Roof Need New Ventilation During Replacement?

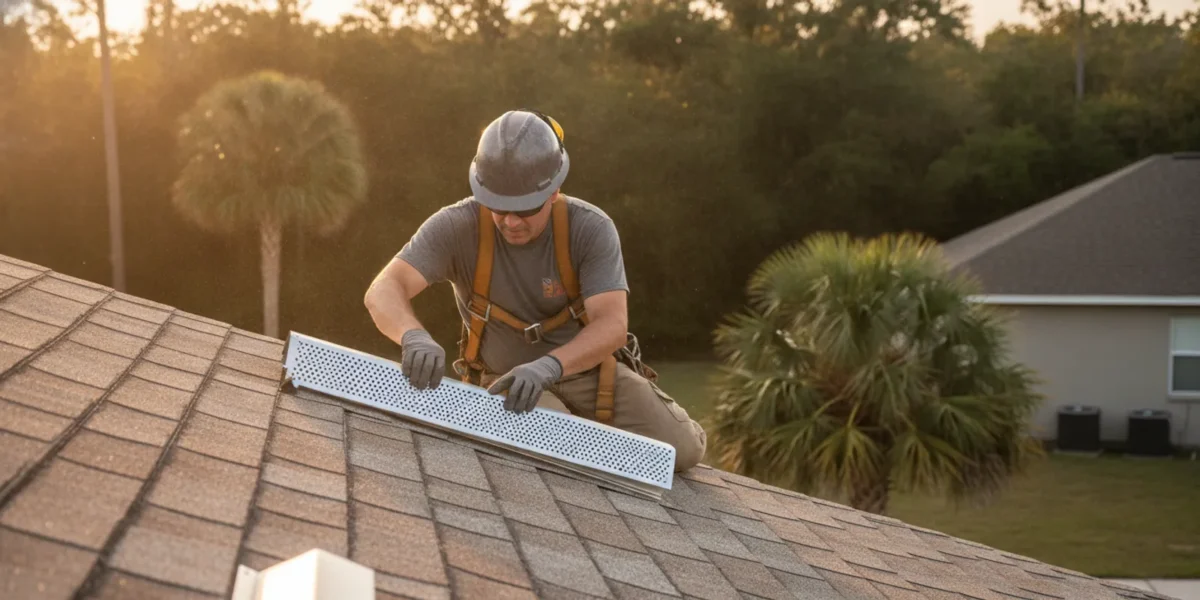
Roof vent installation is worth discussing during a replacement when the existing attic airflow is inadequate, damaged, poorly arranged, or incompatible with the new roof assembly. A replacement creates a practical opportunity to inspect the system, but it does not mean every home needs additional vents. In North Florida, the right decision starts with the roof design, attic conditions, and a balanced plan for bringing air in and letting it out.

Request a free roof inspection

Why consider ventilation during a roof replacement?

Roof replacement exposes parts of the roofing assembly that are difficult to assess from the ground. The contractor can examine existing roof vents, roof decking, and the layout of the roof while planning the new covering. If vents are damaged, blocked, missing, or placed in a way that does not support the intended airflow, it is useful to identify that before the work is complete.

Ventilation is a system, not a single product. Many vented attics use lower intake openings near the soffits or eaves and higher exhaust openings near the ridge or roof peak. Air needs a path between those openings. Insulation, framing, roof shape, and existing vent locations can all affect whether that path works as intended.

A new roof covering by itself does not correct attic airflow problems. On the other hand, adding vents without understanding the existing system can create openings without a useful airflow plan. That is why the decision should be based on inspection and a clear explanation of how proposed changes fit the roof.

If you are weighing a broader project, North Wood’s roof replacement guide explains other planning questions to raise before work begins.

When does a roof need new ventilation during replacement?

New or replacement vents may belong in the scope when inspection identifies a specific problem or when the existing arrangement does not fit the roof assembly. Common reasons to discuss include:

  • Existing vents are damaged or deteriorated. A cracked, loose, corroded, or poorly sealed vent may need repair or replacement as part of the roofing work.
  • There is no clear intake-to-exhaust path. A roof with exhaust openings but little or no usable intake, or the reverse, may need a more complete ventilation plan.
  • Roof areas are isolated from one another. Valleys, additions, hips, and changes in roof height can create attic sections that do not share the same airflow path. A roofer should identify which spaces the vents serve.
  • Existing openings are blocked or covered. Insulation, debris, or construction details can obstruct airflow. The cause and the safest correction should be assessed rather than assuming that another roof vent will solve it.
  • The roof design or materials are changing. A different roof layout or assembly may require a fresh look at vent placement and compatibility. Do not assume the old configuration transfers unchanged.
  • There is evidence of an attic moisture or heat concern. Dampness, condensation, or excessive heat can have multiple causes. These signs justify investigation, not an automatic vent count.

Any recommendation should connect an observed condition to a proposed correction. Ask the contractor to show you the concern with photos where possible, explain what space each vent serves, and describe what will change. A free, photo-documented inspection can help make that discussion more concrete.

What should the roofer inspect before recommending vents?

A useful assessment looks beyond the roof surface. The inspection should consider how the attic is built and how air could move through it. The exact items depend on whether the home has an accessible attic and on the roof design.

  • Existing vent types and locations: Identify intake vents, exhaust vents, and any powered equipment. Note whether openings are intact, clear, and appropriate for their locations.
  • Attic layout: Determine whether the roof contains one open attic or several separated areas. A vent in one section may not ventilate a disconnected section.
  • Intake access: Check whether air can enter at the eaves or soffits and travel past insulation toward the upper part of the roof. Baffles or other details may be relevant where insulation could obstruct the channel.
  • Exhaust arrangement: Review whether high vents are placed to serve the intended attic area and whether the existing design relies on ridge, roof, or gable vents.
  • Obstructions and leakage evidence: Look for blocked openings, staining, damp insulation, or other signs that may call for a separate moisture investigation.
  • Roof condition and planned work: Confirm whether an existing penetration needs repair, whether a new opening is proposed, and how the flashing and surrounding roofing will be integrated.

Ventilation is only one part of attic moisture management. Air leaks from the living space, insulation, bath or kitchen exhaust routing, and roof leaks can also affect attic conditions. A vent change should not be presented as a cure for a leak or a substitute for correcting another source of moisture.

ENERGY STAR’s attic ventilation guide describes ventilation components and installation considerations, including keeping airflow paths open. Use guidance like this to frame questions; the appropriate design for a particular home still depends on its construction and applicable requirements.

How do intake and exhaust vents work together?

Intake vents generally provide a lower entry point for air, commonly near the soffit or eave. Exhaust vents provide an exit higher on the roof, often near the ridge. When the layout is designed to work together, air can move through the attic rather than entering and leaving at an ineffective location.

More exhaust openings do not automatically mean better ventilation. If intake is limited, the system may not have the airflow path the homeowner expects. Likewise, adding an intake opening without a suitable high exit may not resolve the underlying issue. Different vent types can also interact: for example, a contractor should explain how existing gable vents relate to proposed ridge or roof vents instead of simply counting openings.

There is no single vent arrangement to prescribe from the roof covering alone. Roof geometry, attic volume, existing openings, insulation, and local requirements matter. The contractor should identify the intended intake and exhaust strategy and explain any limits imposed by the home’s construction.

The U.S. Department of Energy’s Building America Solution Center discusses disaster-resistant roof venting, including choosing and installing vents with attention to wind-driven rain and other hazards. In storm-prone North Florida, ask how any proposed vent type is suited to its location and how it will be integrated with the roof. That source is general guidance, not a substitute for local code or a project-specific assessment.

Which ventilation options might come up?

The table below compares common categories of work to discuss. It is not a recommendation that a particular home needs one of these options. The right choice depends on the existing roof and attic, intake and exhaust paths, and project requirements.

Option or condition What it may address Questions to ask
Repair or replace an existing vent A damaged, loose, deteriorated, or poorly integrated roof opening. What is damaged? Will the replacement match the opening and be flashed into the new roof?
Add or restore soffit or eave intake A restricted lower-air entry path in a vented attic, where the construction allows it. Can air reach the attic through this area? Could insulation block the pathway?
Add or replace a high exhaust vent An exhaust opening that is missing, damaged, or not serving the intended attic space. What intake supplies it? Which part of the attic will it serve?
Use a different vent layout A roof or attic design where existing vent types or locations do not form a suitable plan. How will the new and remaining vents work together? Are any old openings being closed?
Investigate without adding vents Conditions that could stem from a roof leak, air leakage, insulation, or another moisture source. What evidence points to the cause, and what needs a separate repair or evaluation?

When a project includes new roof penetrations, ask what vent model and location are proposed, how it will be sealed and flashed, and whether any existing opening will be removed or closed. The scope should distinguish ventilation changes from general roof replacement so you can compare the work being offered.

Does every roof replacement need new vents?

No. A roof can be replaced while its existing ventilation remains serviceable and appropriate for the roof design. A contractor may inspect the vents and recommend keeping them, repairing specific components, or revising the arrangement. The explanation should be based on what the inspection finds, not a blanket rule that every roof needs more vents.

Sometimes the sensible work is to preserve the existing openings and make sure they are properly incorporated into the new roof. Sometimes there is a clear reason to replace a vent or address a blocked pathway. In other cases, ventilation is not the source of the problem, and adding vents would not address it.

North Wood’s Roofing offers roof inspections and replacement estimates. Its shingle roofing and metal roofing pages describe two roof covering options; whichever material you consider, ask that the vent plan be explained separately from the material choice.

What warning signs should prompt an attic check?

Some homeowners notice musty odors, visible moisture, staining, or unusually warm attic conditions. These observations can have several explanations and do not prove that the home needs additional roof vents. A roof leak, plumbing issue, bathroom exhaust discharge, air leakage from the home, or insulation condition may also need attention.

From the ground, look for vents that appear visibly damaged or displaced, but do not climb onto the roof to investigate. After a storm, a change in the vent or roof surface is a reason to arrange a safe inspection. North Wood’s guide to signs of a roof leak in Florida can help you recognize roof-related warning signs, while an on-site assessment can determine what is actually happening.

If a vent opening itself is leaking, the immediate concern is the roof detail and its connection to the surrounding materials. A ventilation redesign may or may not be needed. For active leaks or storm damage, see the guidance on roof repair and arrange an inspection rather than treating the symptom with an unplanned new opening.

What should you ask before approving ventilation work?

Before you accept a proposed change, make sure you understand the issue, the intended result, and how the work fits the replacement. These questions can make the conversation more useful:

  1. What did the inspection find? Ask for a plain-language explanation and photos of damaged, obstructed, or missing components when available.
  2. Which attic area does each proposed vent serve? This helps clarify whether separate roof sections are included in the plan.
  3. Where will intake air enter and where will it exit? Ask how the proposed openings form a path and whether existing vent types will stay, change, or be closed.
  4. Could another issue explain the symptoms? Ask whether there is evidence of a roof leak, air leakage, blocked exhaust duct, or another concern outside the vent work.
  5. How will the new opening be integrated? Confirm the location, flashing, sealing, and any changes to existing roof penetrations.
  6. What is included in the written scope? Check that vent work, related repairs, and any exclusions are described clearly before work begins.
  7. Are permits or code requirements relevant? Ask the contractor to explain which local requirements apply to this project and whether they affect the proposed design.

For any roof project, compare clear scopes rather than relying on a vent count or a vague promise of better airflow. If the homeowner is also considering a tune-up for a roof that does not need replacement, review the details of North Wood’s roof tune-up service and ask whether that service fits the roof’s condition.

How does the replacement process affect vent work?

When ventilation changes are approved, they should be coordinated with the roof replacement plan. Before work, establish which existing vents will remain, which will be repaired or removed, and where any new openings are planned. This avoids treating a vent location as an afterthought once roof materials are being installed.

During installation, the vent opening, flashing, and surrounding roof covering need to be handled as a connected detail. The work should follow the product instructions and project requirements. Afterward, ask for a brief review of what changed and for any available photos of the completed vent details. North Wood’s warranty information is available for homeowners who want to understand the company’s stated warranty details; ask how any specific work is covered rather than assuming all components share identical terms.

If you are not sure whether your roof needs new ventilation, request an inspection before deciding. A contractor can review the roof and attic conditions, explain the evidence, and outline options without presuming that more vents are always the answer. North Wood’s Roofing serves homeowners in Gainesville, Live Oak, Lake City, and North Florida with free roof inspections and estimates.

Schedule a free roof estimate

Frequently asked questions

Can roof vents be added during a roof replacement?

Yes, a replacement can be a convenient time to repair, replace, or add vents when inspection supports that work. The contractor should explain the attic area involved, the airflow plan, and how new openings will be integrated into the roof.

Will adding a ridge vent solve poor attic ventilation?

Not necessarily. A ridge vent is an exhaust option, and its performance depends on a suitable intake path and the roof’s layout. Ask how the full system is intended to work before approving an exhaust-only change.

Do signs of attic moisture mean I need more vents?

No. Moisture can result from roof leaks, air leakage, exhaust ducts, insulation conditions, or other sources. Find the cause before choosing a correction; additional roof vents may not address it.

Should I add vents just because I am changing roof materials?

Not automatically. A change in roof covering is a reason to review compatibility and vent details, but a new ventilation layout should be based on the roof and attic assessment rather than the material alone.

Get a clear assessment of your roof ventilation

Roof vent installation during replacement makes sense when it addresses an identified condition and fits a coherent intake-and-exhaust plan. Ask for the findings, proposed locations, and scope in clear terms so you can decide whether the work belongs in your project.
Categories
Blog

What Is Roof Flashing? Where It Can Fail

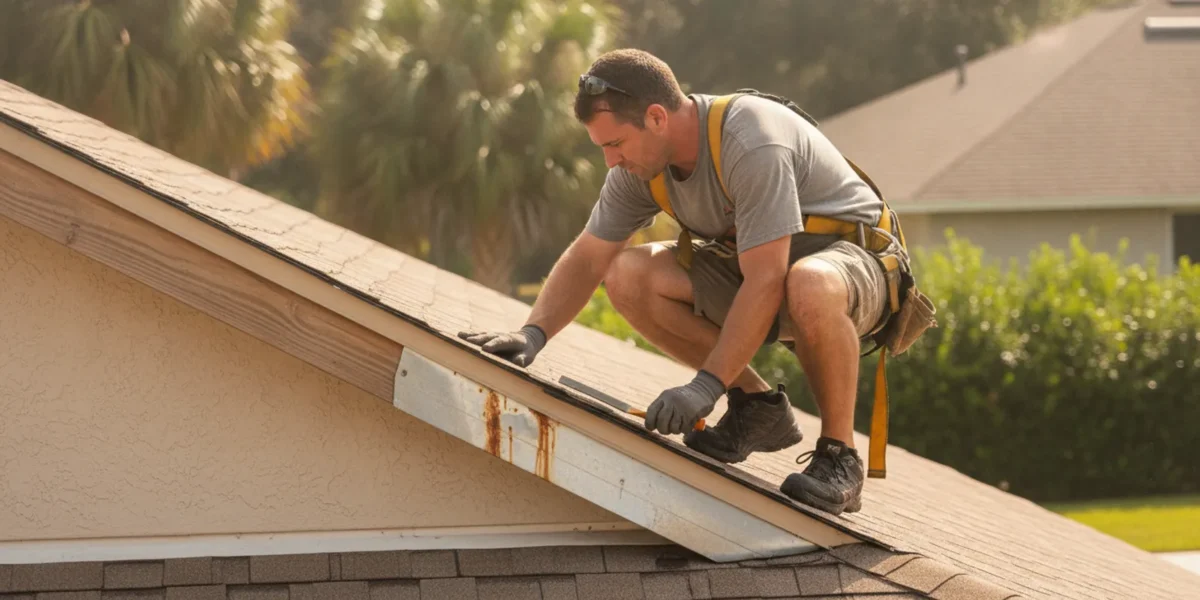
What is roof flashing? It is the formed metal or other compatible material used at roof joints and interruptions to guide water away from vulnerable seams. Flashing helps keep rain from getting beneath the roofing where two surfaces meet, or where something passes through the roof. Understanding its job can help North Florida homeowners recognize possible trouble without climbing onto a roof or assuming every stain means the same repair is needed.

Request a free roof inspection

What does roof flashing do?

A roof is not one uninterrupted surface. It has edges, corners, slopes, walls, vents, chimneys, skylights, and other openings or transitions. Shingles or panels cover broad areas, but those materials alone cannot reliably seal every joint. Flashing is fitted at many of these connections to direct water down and away from the opening, rather than letting it collect at a seam.

Think of flashing as part of a water-shedding system, not as a bead of sealant applied over a gap. Good performance depends on how the flashing is shaped, overlapped, fastened, and integrated with the roofing and nearby building materials. The roof covering above it should shed water onto or past it; the pieces should work together so water can continue toward the eaves and drainage path. Sealant may be used at some details, but it is not a substitute for correctly installed flashing.

Flashing is often made from metal, including galvanized steel or aluminum, though the right material and detail depend on the roof and the point being protected. Compatibility matters: different metals and roofing materials can react differently, and details that suit one roof assembly may not suit another. A roofer needs to assess the actual materials and construction instead of recommending one universal flashing solution.

Where is flashing installed on a roof?

Flashing may be visible at some transitions, but it is not always easy to see from the ground. Common locations include:

  • Roof-to-wall intersections: Where a sloped roof meets a vertical wall, step flashing is commonly woven in with the roofing course by course. Counterflashing or another appropriate detail may protect the top edge, depending on the wall construction.
  • Chimneys: A chimney interrupts the roof surface on several sides. The base and corners need coordinated flashing details, and the upper side may need a cricket or saddle to divert water around a wide chimney.
  • Vents and pipes: A roof opening needs a compatible flashing component, often a formed base or boot, fitted around the penetration and integrated with the shingles or panels.
  • Skylights: A skylight has a frame and a roof opening. Its flashing system connects the unit to the surrounding roof so runoff is directed around it.
  • Valleys and roof edges: Some roof designs use metal at valleys or edges to help guide runoff. The exact detail varies with the roof system and installation plan.
  • Other roof penetrations: Exhaust vents and similar openings also require details suited to their shape, location, and roofing material.

The flashing type is not the only thing that matters. For example, a wall intersection needs the flashing to work with both the roof covering and the siding or masonry above it. A skylight detail depends on the unit and roof assembly. North Wood’s offers skylight installation and repair; homeowners considering a skylight should ask how the roof-to-unit transition will be handled as part of the work.

How can roof flashing fail?

Flashing can stop working for different reasons, and a visible symptom does not identify the cause on its own. The problem may be limited to one piece, or water may be entering somewhere nearby and appearing in a different place indoors. Common failure patterns include:

  • Loose, lifted, or displaced metal: Fasteners may loosen, a piece may be bent, or movement at a joint may open a path for wind-driven rain.
  • Corrosion or deterioration: Exposure to moisture and weather can damage some materials over time. The condition depends on the metal, coating, surrounding materials, and maintenance history.
  • Cracked or failed sealant: Sealant can age or separate. Applying more over the surface may hide a symptom without correcting an underlying installation or water-management problem.
  • Incorrect overlaps or poor integration: If pieces are not layered to shed water, or are not properly integrated with the roof covering and wall materials, water may get behind them.
  • Damage during other work: Roof work, solar or satellite equipment installation, painting, or other activity can disturb nearby flashing. A later leak may appear some distance from the actual opening.
  • Wear around a penetration: A boot or formed flashing component around a pipe may split, pull away, or deteriorate. The pipe itself may also move or the surrounding roofing may be damaged.
  • Water diverted toward a vulnerable seam: Debris, an obstruction, or an unsuitable detail can affect runoff and keep water near a joint longer than intended.
  • Installation detail that does not suit the roof: An incorrect material, shape, fastening method, or connection with adjacent surfaces can leave a weak point from the start.

North Florida’s heat, humidity, heavy rain, and storms can expose weaknesses in roof details. Wind-driven rain may reach places ordinary runoff does not, while repeated wetting and drying can put stress on materials and joints. This does not mean every roof in the region will develop a flashing leak, or that weather alone proves the cause. An inspection should consider the roof’s age and type, recent weather, the location of symptoms, and the condition of connected materials.

What signs might point to a flashing problem?

Clues inside a home can include a new or recurring ceiling stain, dampness near a chimney or skylight, peeling paint, or water marks around an upper wall. In an attic, staining or damp material near a penetration may be worth noting if the space is safely accessible. These signs can also have other causes, such as condensation, plumbing, or a roof issue away from the nearest visible stain. Water can travel along framing or roof components before it becomes visible indoors.

From the ground, a homeowner might notice a piece of metal that appears displaced, a roof-to-wall area that looks irregular, or debris collecting in a roof valley. A ground-level view is limited, however. Flashing can be covered by shingles or siding, and damage is not always visible from below. Do not climb onto a wet, steep, or unfamiliar roof to confirm a suspicion.

If water is actively entering, protect people and belongings first. Move items away from the leak, use a container if it is safe to do so, and avoid touching wet electrical fixtures. Take photographs of the interior damage and note when it appeared and whether it followed rain or wind. If a ceiling is bulging or there is a risk of falling material, keep people clear and contact an appropriate professional. For additional guidance about leak symptoms, see this guide to signs of a roof leak in Florida.

How do roof flashing repairs differ from replacement?

The correct scope depends on what the inspection finds. A localized repair may be appropriate when the problem is confined to a particular flashing detail and the connected roofing remains sound. That could involve correcting a displaced section, replacing a damaged component, or addressing the way a transition is integrated. The specific method should suit the roof material and construction.

Replacement of a larger area may make more sense if several pieces are deteriorated, the underlying roof materials are damaged, or the detail cannot be repaired reliably in place. When a roof covering is being replaced, the roofer can evaluate which flashing can be reused and which should be replaced or modified. A decision should account for the condition of the full connection, not only the part easiest to see.

Here is a practical comparison. These are general possibilities, not a diagnosis or a promise that a particular option will fit every roof:

Situation found during evaluation Possible next step What to clarify
One accessible piece is loose or locally damaged, and nearby materials appear serviceable Consider a focused repair of the affected detail What caused it to move or fail, and how will the connection be restored?
Flashing is worn in multiple places or the adjoining roofing is also deteriorated Compare a broader repair with replacement of the affected roof section Which materials are included, and how will water be directed at each transition?
A roof replacement is planned Review existing flashing as part of the roof scope Which pieces will be reused, replaced, or adapted, and why?
A leak source is uncertain or the indoor mark may have another cause Request an inspection before selecting a repair What evidence points to the proposed source, and are other causes possible?

Ask for a clear explanation of what was inspected, what evidence supports the recommendation, and whether the work addresses the source or only a visible symptom. Photos can help you understand a detail that is hard to view from the ground. North Wood’s Roofing provides free inspections with clear photos and no-pressure options, according to its service information. You can also review the company’s roof repair service and its broader roofing services before asking questions about your situation.

What can homeowners safely do before an inspection?

A homeowner can gather useful information without stepping onto the roof. Start with the indoor symptoms:

  1. Record where the stain or dampness is located, when it first appeared, and whether it changes after rain.
  2. Photograph the affected area and any visible changes over time. Keep a simple note of storms, prior repairs, or other work near the roof.
  3. If it is safe, look from the ground at the roof area above the symptom. Use a camera zoom or binoculars rather than a ladder, and do not walk beneath unstable branches or damaged roof edges.
  4. Tell the inspector about nearby features such as a chimney, wall junction, vent, or skylight, but avoid concluding that the closest feature is necessarily the source.
  5. Ask what the inspection can and cannot establish, what repair choices are available, and whether the recommended work includes related roofing materials.

Do not pry up shingles, pull at metal, or spread sealant on an elevated roof. Those actions can create a fall hazard, damage materials, or make it harder to identify the original problem. If temporary protection is needed, have a qualified professional advise on a safe approach. After storm damage, document what you can see from a safe location and arrange an evaluation rather than trying to inspect a roof yourself.

When comparing contractors in Florida, homeowners can consult the state’s Department of Business and Professional Regulation for licensing information. Ask a roofer to explain the findings, the work included, and any applicable workmanship or material warranty in writing. North Wood’s Roofing is a Florida licensed and insured residential roofing contractor; the company describes its approach as honest pricing, quality workmanship, and no-pressure options. Its about page provides additional company information.

What should you ask a roofer about flashing?

A useful conversation should help you understand the cause and the proposed scope. Consider asking:

  • Where do you believe water is entering, and what evidence supports that conclusion?
  • Is the flashing itself damaged, or is the issue in the connection between flashing and another roofing or wall material?
  • Will you repair one area or replace multiple components? Why is that scope appropriate for the roof’s condition?
  • Could water be entering at another point or traveling before it appears indoors?
  • Will the written estimate identify the materials and affected areas?
  • What should I expect if the leak returns, and what warranty terms apply to this specific work?

Answers should be specific to the roof being evaluated. Be cautious of a recommendation that identifies a cause without inspecting the relevant area, or that relies only on adding sealant without explaining why the detail failed. The right next step may be a focused repair, a more extensive project, or further evaluation if the source is uncertain.

Frequently asked questions about roof flashing

Can a roof leak if the flashing looks intact?

Yes. Some flashing is hidden, and an intact-looking exterior surface does not confirm that overlaps and connections beneath it are working. A leak may also originate elsewhere, so an indoor stain alone cannot identify flashing as the cause.

Does every roof use the same kind of flashing?

No. Details vary by roofing material, roof design, the feature being protected, and how nearby walls or openings are built. A flashing component should be compatible with the roof assembly and installed to shed water at that particular transition.

Is sealant enough to fix flashing?

Not necessarily. Sealant can be part of a suitable detail, but it cannot correct every problem with placement, overlap, fastening, damaged materials, or water flow. An evaluation should identify the failure mechanism before selecting a repair.

Should I inspect flashing after a storm?

You can look from the ground for obvious changes and check indoors for new moisture, but do not climb onto the roof. If you see damage or notice a leak, record what is visible and arrange a professional assessment.

Schedule a free roof estimate

Get a clear assessment of the roof detail

Flashing is a small part of a roof system with an important job: helping water pass vulnerable transitions without entering the home. When a leak or visible change raises concern, a careful inspection can distinguish a flashing problem from other possible causes and explain the available options. North Florida homeowners can contact North Wood’s Roofing for an honest evaluation and a clear next step.

Categories
Blog

What Layers Make Up a Residential Roof? Roof Layers Explained

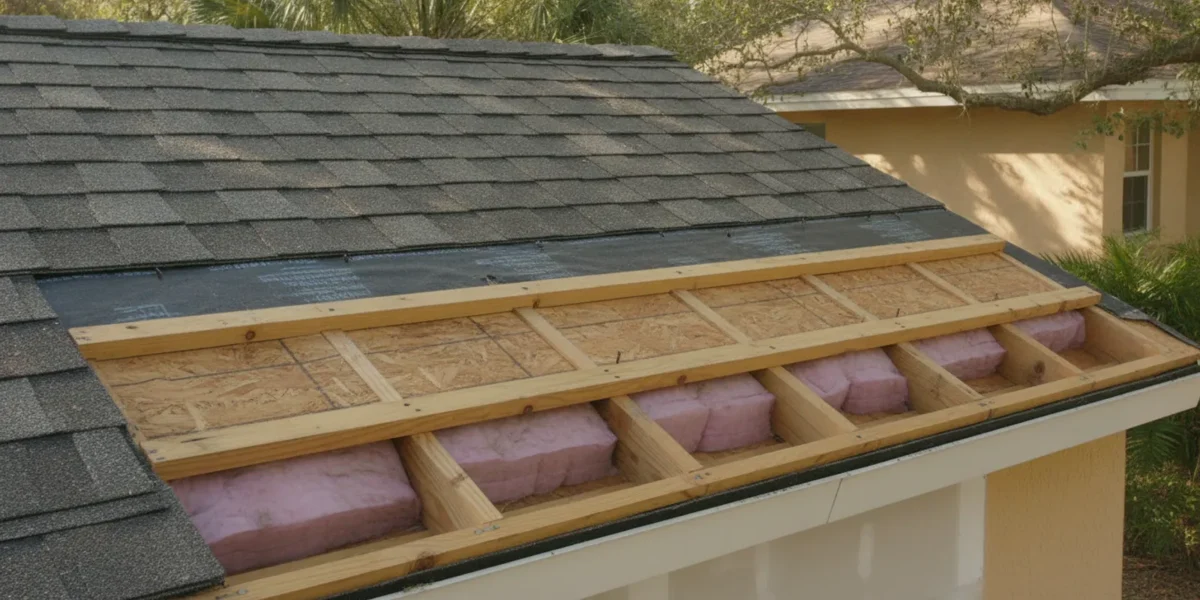
Understanding roof layers explained in plain terms can help you follow an inspection, compare repair options, and understand what a replacement includes. A residential roof is a connected assembly: the visible covering sheds most rain, while the layers and details beneath it help manage water, support the system, and connect it to the house. The exact materials vary by roof design and covering, so a roofer should assess the actual assembly before recommending work.

Request a free roof inspection

What are the main layers of a residential roof?

On a typical sloped home with asphalt shingles, it is useful to picture the roof from the attic outward. Starting at the house, the assembly may include the roof framing, roof deck, underlayment, flashing and other water-management details, and the shingles. Not every component is a continuous sheet across the entire roof. Flashing, for example, is placed at joints and openings where water needs a carefully managed path.

A metal roof or another roof design uses a different covering and may have different supporting details. A flat or low-slope roof also has its own assembly. This overview is a guide to common parts, not a specification for every home or a substitute for checking the roof in person.

Roof component Where it is What it does What a homeowner can look for
Framing Below the roof deck Supports the roof assembly and transfers loads to the structure From a safe attic vantage point, look for visible sagging, moisture, or damaged wood; do not climb onto framing
Roof deck Above the framing Provides the base to which roofing materials are attached Ask whether any soft, damaged, or unsuitable areas need attention when the covering is removed
Underlayment Over the deck, below the covering Adds a layer beneath the roof covering as part of the water-management system It is usually concealed; ask what material and installation are included in a replacement
Flashing and edge details At roof joints, penetrations, and edges Helps manage water at transitions and openings Look for displaced or visibly damaged details from the ground; leave close inspection to a professional
Roof covering Outermost roof surface Sheds weather and protects the layers beneath it Look for missing, lifted, or visibly damaged pieces from a safe location
Ventilation and drainage details At roof openings and edges Support airflow or move water away from the roof edge, depending on the component Check for blocked visible openings or overflowing gutters, without assuming one symptom identifies the cause

What supports the roof covering?

Roof framing

Framing is the structural support below the roof deck. Depending on the home, it may be made up of rafters or prefabricated trusses. It is not a roofing surface, but it matters because the rest of the assembly depends on a sound support structure. A homeowner may see part of the framing from an attic, but should not walk on ceiling joists or trusses unless the space is specifically designed for that use. If you notice visible movement, damage, or persistent dampness, describe what you see to a qualified roofing professional.

Framing is generally not something to diagnose from a quick glance at the roof outside. A roof inspection considers accessible areas and visible conditions, while any structural concern may call for an appropriate specialist. Avoid treating a stain or a small crack as proof of a particular structural problem without an evaluation.

Roof deck or sheathing

The roof deck, often called sheathing, is the surface attached over the framing. Roofing materials are installed over this base, with the exact fastening and assembly depending on the roofing system. In a replacement, the deck may be concealed until old materials are removed. That is why an estimate should explain what happens if the crew finds an area that is damaged or unsuitable beneath the existing roof, including how the condition will be communicated and handled.

From inside an accessible attic, a homeowner may be able to see the underside of the deck. Dark marks, visible dampness, or daylight where it should not be are reasons to ask for a professional assessment. These observations do not establish the cause on their own. Moisture can enter through different parts of a roof assembly or come from a non-roof source, so tracing it matters before work is chosen.

How do underlayment and flashing manage water?

Underlayment

Underlayment is installed over the roof deck and beneath the visible roof covering. It is part of the roof’s layered water-management approach, not a replacement for a properly installed covering or carefully finished details. The type and placement can depend on the roof design and selected system. Because underlayment is hidden after installation, ask the contractor to identify what is included and how it fits the planned roof assembly.

In North Florida, roofs face heat, humidity, and periods of heavy rain and storms. Those conditions make careful installation and sound details important, but no single layer makes a roof immune to weather. For general roofing-system information, homeowners can also consult the National Roofing Contractors Association. For a home-specific explanation, ask a roofer to show which layers are present and what condition they are in.

Flashing and transitions

Flashing is used at transitions and penetrations, such as where a roof meets a wall or where a vent passes through the roof. The precise design depends on the location and roofing material. These areas need particular attention because water does not move across a roof as if the surface were one uninterrupted plane. Valleys, edges, walls, and penetrations all create transitions that must be integrated with the surrounding materials.

It can be hard to judge flashing from the yard. A visible piece that appears bent or displaced is worth mentioning, but the hidden portions and water path may require a closer inspection. Do not pull up roofing, apply caulk, or climb a wet or steep roof to investigate. A quick patch that covers the visible point without identifying how water is getting in may not address the underlying issue.

When comparing repair proposals, ask which location is being addressed, what the proposed work includes, and whether the roofer found related conditions. North Wood’s Roofing offers roof repair and inspections; an on-site evaluation can help distinguish a localized repair from a wider concern.

What does the outer roof covering do?

The roof covering is the part most people see. It is designed to shed weather and protect the underlying assembly. On a shingle roof, individual shingles overlap so water can run down the slope. On a metal roof, the panels and their seams form a different outer system. Each covering has its own installation details and maintenance considerations, so the rest of the assembly should be considered alongside the material itself.

Homeowners comparing these options can review North Wood’s Roofing information about shingle roofs and metal roofs. The right choice depends on the home, existing roof, project goals, and the details of the proposed system. A material name by itself does not explain how the entire roof will be assembled or whether existing layers need to be removed.

From the ground, you may be able to notice missing or visibly lifted pieces, uneven areas, or debris. These signs can justify an inspection, but they do not always show the condition of concealed layers. Do not walk the roof to get a closer look. Roof surfaces can be slippery, and a homeowner may cause damage or fall while trying to inspect them.

Are ventilation, gutters, and skylights roof layers?

Not exactly. Ventilation openings, gutters, and skylights are related to how a roof works, but they are not all continuous layers stacked across the roof deck.

  • Ventilation: Roof and attic ventilation components are openings or pathways in a designed system. Their placement and function depend on the house. A homeowner should not assume that adding an opening is always the right fix for a moisture or comfort concern.
  • Gutters: Gutters collect and direct water at the roof edge. They are part of the home’s drainage setup, not a waterproof layer beneath the roof covering. Keeping them clear may help water move through the intended route, but gutters do not universally prevent drainage or foundation problems. See the company’s gutter services for information about gutter work.
  • Skylights: A skylight interrupts the roof surface and needs the appropriate integration and flashing around it. If you see moisture near one, the source should be evaluated rather than assumed to be the glass alone. Learn about skylight installation and repair.

These parts connect to the roof assembly, so a problem near one may involve nearby materials or a water path that is not obvious from inside the home. A stain on a ceiling, for example, tells you where water became visible, not necessarily where it entered the roof. Share when you first noticed it, whether it changes after rain, and any related observations with the inspector.

How do the layers work together in North Florida?

Think of the roof as a system rather than a stack of independent products. The framing supports the deck. The deck provides the base. Underlayment and the outer covering work together as part of the weather-shedding assembly. Flashing addresses transitions, while edges, openings, ventilation, and drainage components have separate roles. A weakness or installation issue at one point can affect how the broader assembly manages water.

Heat and humidity can affect roofing materials over time, while strong storms can expose weaknesses or cause new damage. That does not mean every roof needs replacement after a storm, or that every leak indicates a failed roof system. Inspection findings, the condition of the covering and accessible layers, and the scope of any affected area help guide the next step. A repair may be appropriate in some situations; replacement may be considered when the overall condition and repair needs point that way.

North Wood’s Roofing is a veteran-owned residential roofing contractor serving Gainesville, Live Oak, Lake City, and North Florida. The company describes its approach as owner-led, with free inspections that include clear photos and no-pressure options. You can learn more about the company and its approach, or see its roofing services.

What should you ask when a roofer explains the roof layers?

Whether you are considering a repair or replacement, a few specific questions can make the discussion easier to follow:

  1. What did you observe? Ask the roofer to show photos and identify the visible condition, its location, and whether it is confirmed or still needs investigation.
  2. Which parts of the assembly are included? Ask whether the proposal addresses the covering, underlayment, flashing, edges, penetrations, or another component. Do not rely on a broad phrase like “fix the roof” without a clear scope.
  3. What is hidden until work begins? Ask how concealed deck or other conditions will be documented and discussed before additional work is done.
  4. What are the options? Ask whether a targeted repair is reasonable, what it would address, and what concerns would remain. If replacement is recommended, ask why the full assembly or covering should be addressed instead.
  5. What materials and installation details are proposed? Ask for the names of the materials and a plain explanation of how the parts connect, especially around edges and penetrations.
  6. What is covered by the written warranty? Review the actual terms and ask which materials or workmanship are covered, for how long, and what exclusions apply. Warranty terms are not all interchangeable; North Wood’s Roofing provides details on its warranty information page.

A clear answer should connect the observed condition to the proposed work without asking you to guess what is included. If you are comparing proposals, compare scope and materials as well as the final line items. A lower or higher total alone does not tell you whether two proposals cover the same work.

Frequently Asked Questions

Does every residential roof have the same layers?

No. The roof covering, slope, openings, construction, and chosen system affect the assembly. A common sloped shingle roof is a useful example, but a metal roof or low-slope roof may use different materials and details. Ask a roofer to explain the actual system on your home.

Can I tell whether underlayment is damaged from the ground?

Usually not. Underlayment is concealed below the outer covering. Visible signs such as missing shingles or an interior stain can prompt an inspection, but they do not establish the condition of the underlayment. A professional assessment is needed to determine what is visible and what may be hidden.

Does a ceiling stain show exactly where the roof is leaking?

Not necessarily. Water can travel before it appears indoors, and a stain can also have a source unrelated to the roof. Note the location and timing, protect belongings if needed, and request an evaluation rather than assuming the entry point based on the stain alone.

Are gutters one of the roof layers?

No. Gutters are attached near the roof edge and help collect and direct runoff. They are part of the drainage setup, separate from layers such as the deck, underlayment, and roof covering.

When should I request an inspection?

Request an evaluation if you notice a leak, visible damage, a change after a storm, or another condition you cannot safely assess. An inspection can help clarify what is visible, what needs attention, and whether repair or further evaluation is appropriate.

Schedule a free roof estimate

Get a clear explanation of your roof

Each roof is different, and the most useful explanation is one tied to the home’s actual materials and condition. If you are unsure what layers your roof has or what a proposed repair includes, ask for a photo-supported inspection and a straightforward description of the options.

Categories
Blog

Roof Pitch Explained Florida: A Homeowner Guide

A roof can look nearly flat from the yard while still having a measurable slope that affects how rain moves across its surface. For North Florida homeowners, understanding that slope can make conversations about repairs, replacement, drainage, and roofing materials much easier.

Request an honest roof inspection from North Wood’s Roofing.

Roof pitch explained florida: roof pitch is the roof’s slope, written as rise over 12 inches of horizontal run. A 4-in-12 pitch, for example, rises 4 inches for every 12 inches across. Pitch can influence how a roof sheds water and which roofing systems may be appropriate, but the roof’s condition, drainage details, and manufacturer requirements matter too.

The ratio is simple once you know what each number means. Next, we will define roof pitch in plain language and show how the measurement relates to the roof above your home.

What Is Roof Pitch? A Simple Definition for Homeowners

Roof pitch is the measured slope of a roof. It describes how much the roof rises compared with the horizontal distance across it. Roofing professionals usually express that measurement as a ratio, which makes it easier to describe a roof consistently. The term slope is often used for the same basic idea. For a source-backed definition, see this overview of how roof pitch is measured.

How the rise-over-12 measurement works

Most residential roof-pitch descriptions use 12 inches of horizontal distance as the reference, or run. The first number tells you how many inches the roof rises during that 12-inch run. For example, a 4-in-12 roof rises 4 inches for every 12 inches of horizontal distance. It does not mean the entire roof rises only 4 inches. The ratio is a consistent way to describe the angle across a roof plane.

A lower first number indicates a gentler slope, while a higher first number indicates a steeper slope. Those terms are useful for communication, but the ratio is more precise than saying a roof looks gently or sharply sloped.

Why a visual guess can be misleading

Two roof sections can look similar from the ground while having different measured slopes. Roof shape, framing, nearby trees, camera angle, and the distance from the house can all affect what you see. A roof may also have more than one plane, with different sections meeting at different angles. That is why pitch should be measured rather than estimated from a driveway or street view.

An accurate measurement can help a homeowner and roofing professional discuss the existing roof clearly during repair, maintenance, or replacement planning. If you are unsure about the pitch or the condition of a roof section, a professional evaluation can provide a more dependable starting point than visual inspection alone.

How Do You Read a Roof Pitch Ratio?

Roof pitch is the slope of a roof, written as a ratio that compares vertical rise with 12 inches of horizontal run. This is a useful shorthand for discussing roof design, drainage, and material requirements. But it is not a measurement most homeowners should try to confirm by climbing onto the roof.

Read the first number as rise and 12 as run

  1. Start with the first number. In a ratio such as 3:12, the 3 represents the number of inches the roof rises vertically.
  2. Keep the second number in mind. The 12 represents 12 inches of horizontal distance, or one foot of run. The ratio describes the relationship between these two measurements, not the length of the roof surface.
  3. Apply the same pattern to 4:12. A 4:12 roof rises 4 inches for every 12 inches of horizontal run. This is the standard example used to explain how pitch ratios work. A longer roof section repeats that relationship, but the ratio itself does not change.
  4. Read 6:12 the same way. A 6:12 roof rises 6 inches over each 12 inches of horizontal run. Because the rise is greater for the same run, the roof surface is steeper than a 3:12 or 4:12 roof.
  5. Do not confuse pitch with a visual guess. Roof planes, dormers, wide-angle photos, shadows, and camera position can make a roof look flatter or steeper than it is. Exact pitch can affect roofing-system choices, so an image alone is not a dependable measurement.

For a homeowner, these ratios are best used to understand an inspection report or a roofing discussion. If the pitch, condition, or drainage is uncertain, a qualified inspection can provide a safer, more reliable evaluation than attempting to measure it from the roof.

For additional background, the roof-pitch definition and 4:12 example are documented by this roof pitch reference.

Why Roof Pitch Matters for Florida Drainage

How slope helps move rainwater

Roof pitch influences how quickly rainwater sheds from a roof surface. A steeper slope can help water move toward the edges. While a lower slope may give water more opportunity to linger when the roof surface, seams, flashing, or drainage components are not working together. That does not make one pitch universally better for every Florida home. The roof’s design, covering, installation details, and condition all matter.

FEMA’s sloped-roof guidance uses 3:12 or greater as a reference for sloped roofs and identifies roof drainage as one part of the overall roofing system. In North Florida, that system has to manage frequent rain as well as heat, humidity, and storm conditions. Roofing products and installation details should also follow the applicable manufacturer’s instructions, including guidance for high-wind locations. Details such as properly placed fasteners, appropriate roof-edge protection, and sound flashing can affect how well the assembly manages water.

Pitch is only one part of the drainage plan

Runoff volume can be larger than many homeowners expect. WSU Extension estimates that 100 square feet of roof can produce about 62 gallons of runoff from one inch of rain. The actual amount collected depends on the roof area and rainfall, but the example shows why roof edges, gutters, and downspouts deserve attention alongside pitch.

Gutters and downspouts help direct rainwater down and away from the home, but they need to be adequately sized, clear, and connected to a sensible discharge path. Learn more about gutter installation and drainage when evaluating the full system. If you are unsure how your roof pitch, edges, and drainage work together, a photo-documented inspection can clarify the condition without assuming that pitch alone explains the problem.

Sources: FEMA sloped-roof fact sheet and WSU Extension roof runoff guidance.

How Pitch Can Affect Roofing Material Choices

Roof pitch is one part of planning a roofing system. It can affect how quickly water moves across the roof and which material systems can be considered, especially on lower-slope sections. It does not select the material by itself. The existing deck, roof layout, flashing details, underlayment, ventilation, exposure, and the product manufacturer’s instructions all matter.

Use pitch as a planning category, not a final answer

The ranges below are useful conversation starters for a homeowner. They are not code categories, engineering determinations, or a promise that every product works within a given range. A roof can also contain more than one slope, so different sections may need separate review.

Roof pitch categories for early material planning
Planning category Example pitch range What it may mean for planning
Low-slope 0:12 to 3:12 Material compatibility, water-shedding details, and installation requirements deserve close review. Some systems have minimum-slope limits.
Moderate example 4:12 to 6:12 Many common residential options may be considered, but the complete assembly and the selected product instructions still control the decision.
Steeper example 7:12 to 12:12 or higher Access, fastening, flashing, underlayment, and installation planning become especially important. The material choice still depends on the roof design.

For asphalt shingles, the U.S. Department of Energy’s Building America Solution Center says installation should follow the manufacturer’s instructions for high-wind locations. Its guidance also addresses details such as correct fastening, drip edge, and flashing. Those details show why a pitch discussion should include the whole roofing assembly rather than a material name alone: manufacturer-based shingle installation guidance.

If you are comparing metal and shingle systems for a Gainesville, Live Oak, or Lake City home, review the differences in Florida roofing material options. When pitch or the existing roof condition is uncertain, a professional evaluation can help connect the measurement to a practical replacement or repair plan.

Can a Homeowner Measure Roof Pitch Safely?

Homeowners can learn useful basics about roof pitch without climbing onto the roof. From the ground, you can identify whether a roof plane appears relatively low, moderate, or steep and note whether different sections have noticeably different slopes. These observations can help you describe the home when requesting an evaluation, but they are not a substitute for an exact measurement.

What you can observe from the ground

Look from a level location across the street, driveway, or yard rather than standing beneath an edge or trying to reach the roof. Notice the general angle of each visible roof section, the direction water would travel toward the eaves, and whether additions or dormers appear to have a different slope. Binoculars or a zoomed photo may help you see roof planes from a safe position, but avoid treating a photo as a precise measuring tool.

You can also look for visible signs that make a professional review worthwhile, such as stained areas, damaged shingles, or water-management concerns around roof edges. Do not walk the roof or use a ladder to take measurements. Wet surfaces, loose materials, roof edges, and changes in elevation can create risks that are difficult to judge from the ground.

Why an exact measurement matters

Pitch is expressed as the amount a roof rises over 12 inches of horizontal run. A small difference in the ratio can affect planning for materials, underlayment, flashing, and drainage details, and the correct requirements vary by roofing system and manufacturer. An estimate based only on appearance could therefore lead to the wrong assumption about what the roof needs.

A qualified roofing professional can assess the pitch along with the roof’s condition, construction details, and water-management components. If you are planning repair or replacement in Gainesville, Live Oak, Lake City, or nearby North Florida communities. A photo-documented, no-pressure evaluation can give you a clearer basis for decisions without asking you to take an unnecessary risk.

Why Florida Homeowners Should Have Roof Pitch Explained

What pitch does not tell you

Roof pitch is useful for planning, but it is only one characteristic of a roofing system. A steeper or lower slope does not, by itself, tell you how well the roof will handle wind. How long it will last, or whether a particular material is appropriate. Those questions depend on the complete assembly and the condition of the home.

For example, installation details matter alongside the slope. The Building America Solution Center advises following the shingle manufacturer’s instructions for high-wind locations. Placing fasteners in the designated nailing zone, and avoiding nails that are over-driven or under-driven. It also identifies flashing at roof penetrations and roof-wall intersections as part of water management. These details are easy to miss when a homeowner looks only at the roof’s angle. Review the installation guidance for the limits of what pitch alone can explain.

Materials, underlayment, flashing, ventilation, roof edges, and drainage all deserve their own review. Pitch may influence which systems can be considered, but manufacturer requirements and the actual roof structure still matter. In North Florida, heat, heavy rain, humidity, and storm exposure make a complete evaluation more useful than a pitch number in isolation.

Questions to ask about your roof?

If you are planning work, ask the roofing professional to explain the whole assembly in plain language:

  • What is the measured pitch, and how does it affect the material options being proposed?
  • Which underlayment, flashing, and fastening details are part of the planned installation?
  • How will roof edges, penetrations, valleys, gutters, and downspouts be addressed?
  • Which product instructions and location-specific wind considerations apply?
  • What visible conditions should be documented before repair or replacement?

These questions can make a roof replacement planning guide more practical because they connect the pitch measurement to decisions that affect the entire project. If a storm has caused visible damage, ask for a focused evaluation through Florida storm damage roof repair resources rather than assuming the pitch explains the problem.

When Should You Request a Professional Roof Inspection?

You do not need to know your exact roof pitch to recognize when an evaluation could help. Request an inspection when the roof’s condition, drainage, or future plans are unclear, especially before a small concern becomes a larger repair decision.

  • You notice signs of a leak or visible damage. Stains on ceilings, damp attic areas, missing or lifted roofing materials, damaged flashing, and exposed components deserve attention. Review these signs of a roof leak and arrange an evaluation rather than assuming the problem is minor.
  • Water does not appear to drain as expected. If you see standing water, overflowing roof edges, or uncertain downspout discharge during rain, an inspection can look at the roof slope, edges, flashing, and drainage path together. Pitch influences how water sheds, but it is only one part of the system.
  • You are considering a material change or replacement. Roof pitch can affect which roofing systems and installation details may be appropriate. Before comparing options, ask a professional to review the existing assembly, condition, and measurements. A residential roofing services provider can help connect that review to repair, maintenance, or replacement planning.
  • Your home has recently experienced severe weather. Storm damage is not always obvious from the ground. An inspection can document visible conditions and help separate urgent repairs from issues that can be monitored.

North Wood’s Roofing serves homeowners in Gainesville, Live Oak, Lake City, and nearby North Florida communities. Its inspections are photo-documented and designed to give homeowners a no-pressure view of roof conditions and available options.

If you are unsure whether your roof needs attention, request an honest professional evaluation before choosing a repair or replacement path.

Frequently Asked Questions

How do I understand the pitch of a roof?

Roof pitch describes how much a roof rises for every 12 inches of horizontal distance. A 4-in-12 roof rises 4 inches across that 12-inch run. The ratio helps homeowners compare slopes, but it is not the same as a roof angle or a percentage. An exact pitch should be measured rather than guessed from a ground-level view.

What does a 3/12 roof pitch mean?

A 3-in-12 pitch rises 3 inches for every 12 inches of horizontal run. It is generally considered a lower-slope roof category, so drainage details and the selected roofing assembly deserve careful review. The suitability of shingles, tile, or another material depends on the product instructions and the complete installation, not the ratio alone.

Does a steeper roof drain better in Florida?

A steeper slope can help water shed more quickly, but pitch is only one part of the drainage system. Roof edges, flashing, valleys, gutters, downspouts, and installation quality also affect how rainwater is managed. In North Florida, an inspection can help identify whether a drainage concern is related to pitch, roof condition, or another component.

Can you put shingles on a low-slope roof?

That depends on the exact slope, the shingle product, and the manufacturer’s installation requirements. Some lower-slope applications may need different underlayment or additional water-management measures. A professional should confirm the measurement and review the proposed roofing assembly before replacement work begins.

Get Started With a Clear Roof Evaluation

Roof pitch is one part of understanding how your roofing system handles water and which materials may fit. When the pitch, condition, or drainage is uncertain, an evaluation can help you plan the next step with better information. To request an honest, no-pressure roof inspection or evaluation, contact North Wood’s Roofing through the website.

Categories
Blog

Roof Shingle Colors Florida Homes: How to Choose for Home and Climate

If you are researching “roof shingle colors florida homes,” start by comparing actual samples rather than choosing from a shade name alone. The roof covers a large part of the exterior, so its color affects the home’s overall appearance, how well the roof works with fixed features, and how the house looks in North Florida’s bright sun and changing weather. Compare samples with your siding, trim, and surroundings before making a final choice.

Request a free roof inspection or estimate

What should you consider before choosing a shingle color?

Start with the parts of the home that are expensive or difficult to change. Roof color should make sense beside the exterior features that will remain in place, not only look attractive on a small sample card.

  • Exterior walls: Compare the sample directly with the siding, brick, stucco, or other wall finish. A roof may look balanced beside one wall color and too stark beside another.
  • Trim and accents: Check fascia, shutters, doors, and other prominent details. A roof can connect contrasting colors or make them feel more pronounced.
  • Permanent surroundings: Consider mature trees, nearby homes, and the general character of the street. The roof does not need to match a neighbor, but its color should feel intentional in context.
  • Future exterior plans: If painting or changing the trim is already planned, decide which work will happen first. Choosing a roof around a color that will soon change can create avoidable mismatches.
  • Personal preference: Narrow the choices to colors you would be comfortable seeing every day. Trends can be a useful source of ideas, but a roof is a long-term visual element.

Color names are not standardized across manufacturers or product lines. “Weathered gray,” “charcoal,” or “brown” can look different from one shingle collection to another. Compare the actual options available for the roofing product being considered, rather than assuming a name describes a universal shade.

How do shingle colors work with your home’s exterior?

Look at the home as a group of large color areas: roof, walls, trim, and any visible masonry. A useful first step is deciding whether you want the roof to blend with those elements or create a clear contrast. Neither approach is automatically right; the best choice depends on the home’s proportions, existing colors, and your taste.

Choose a coordinated look

A coordinated palette uses related tones without making every surface identical. For example, a roof with a mix of warm gray and brown notes may sit comfortably beside warm-toned siding or brick. A cooler gray blend may feel more at home next to white, blue, or cool gray exterior colors. Treat these as starting points, not fixed rules: the color in the sample and the color on the whole house may read differently.

When the exterior already has several strong colors or textures, a quieter roof can help the overall design feel settled. If the siding is plain and the trim is restrained, a shingle blend with more visible variation may add interest. The goal is a balanced exterior, not a roof that competes with every other feature.

Use contrast with care

A dark roof beside light walls creates a distinct outline. A lighter roof may make the top of the home feel less visually heavy. But contrast depends on more than light versus dark: undertones matter too. A brown roof can clash with cool-toned gray siding even when each color looks appealing on its own.

Before settling on a strong contrast, view samples from the street as well as close up. The roof occupies a broad area, and the overall effect may be more pronounced at a distance. Consider the shape of the home, the amount of roof visible from the front, and whether the trim already provides a strong contrast.

Does Florida’s climate affect the color decision?

Florida’s sun, heat, humidity, and storms make it sensible to think about practical roofing performance alongside appearance. A color choice does not replace sound roof design, proper installation, or regular attention to the roof’s condition. Nor should a homeowner assume that color alone will solve a comfort or energy problem. Roof construction, attic conditions, ventilation, insulation, and other parts of the home all matter.

Light and dark surfaces can absorb and reflect different amounts of sunlight, but the real effect on a particular home depends on the whole roofing assembly and house. If reducing heat gain is a priority, ask the contractor what options are available for the specific shingle product and what factors beyond color should be evaluated. Avoid choosing based only on a broad promise that a certain shade will make the home cooler.

Storm readiness is a separate question from appearance. A Connecticut government guide describes ways to retrofit one- and two-family homes to reduce losses from hurricane winds; it is general homeowner guidance, not Florida-specific code advice or a shingle-color recommendation. For Florida requirements and the right roof assembly for your home, ask a qualified local roofing professional and consult applicable local authorities. Read the guide to hurricane wind protection for homes.

For a replacement, compare color only among products and systems that meet the project’s needs. If you are reviewing asphalt options, explore the available shingle roofing choices and discuss product details with the contractor. Homeowners considering a different roof type can also review metal roofing options; the right material decision involves more than color alone.

How do light and dark shingles compare?

Light and dark colors each have visual strengths and tradeoffs. A comparison table can help you decide what to check, but it cannot predict how a particular roof will look or perform without considering the product, home, and installation.

Choice How it may look What to consider Sample-checking tip
Light or pale blend May create a softer, less pronounced roofline beside some exterior palettes. Look at the shade against trim and wall colors; a pale sample may appear brighter across a large roof. View it in direct sun and shade, then from the street.
Medium gray or brown blend Often offers a middle-ground appearance that can coordinate with varied exterior tones. Undertones and shingle color variation can change the overall impression. Compare the actual product sample beside masonry, siding, and trim.
Dark gray, brown, or near-black blend Can provide a strong outline and a more pronounced contrast with light walls. Make sure the contrast suits the house and ask about the full roof system if heat is a concern. Judge the sample at a distance as well as up close.
Multitone or varied blend May add texture and connect several exterior colors. Check that the color variation does not compete with patterned siding or masonry. Use a larger sample or several shingles when possible.

These descriptions are visual tendencies, not guarantees. Product names and available blends vary. Ask to see the actual color range offered for your roof, and confirm that the chosen product is appropriate for the planned installation.

How can you judge a sample accurately?

A small printed swatch is useful for making an initial shortlist, but it is a poor substitute for seeing the roofing material outdoors. A roof is a large surface, and the color can appear different under changing light. Use this process before approving the final selection:

  1. Shortlist a few options. Begin with colors that fit the exterior and your preference. Too many choices make meaningful comparison harder.
  2. Get samples of the specific product. Confirm the product line and color name. Do not assume a similar name in another collection will look the same.
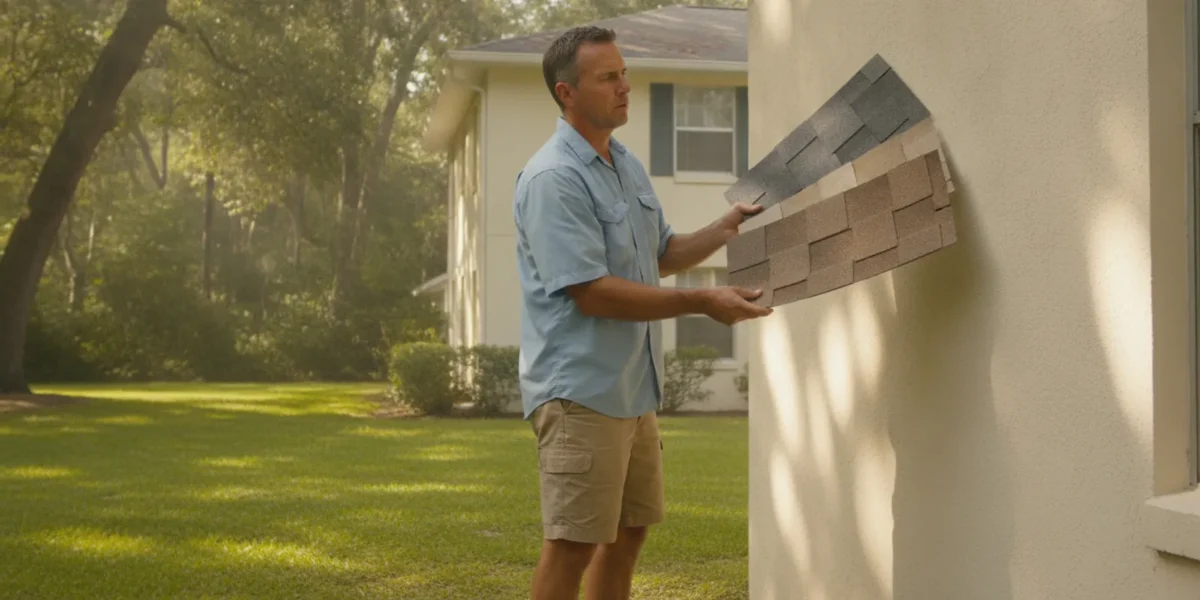
  3. Place samples by the home. Hold or lay them near the siding, trim, brick, or stone they will sit beside. Compare them in more than one location if the exterior has different finishes.
  4. Check different light. Look at the samples on a bright day and in shade. If practical, check them at more than one time of day. A color that seems subtle under cloud cover may read differently in strong sun.
  5. Step back. Look from the curb or another normal viewing point. Close-up details can disappear at a distance, while a strong light-dark contrast becomes more obvious.
  6. Review the complete selection. Confirm the color, product, and scope of work in the estimate or project documents before work begins.

If you cannot obtain a large sample, ask the contractor what product samples or recently completed examples are available to view. Photos can help with a shortlist, but camera settings, screen displays, and lighting can all affect how a color appears. Use photos as a reference rather than the final test.

What should you check beyond color?

Color is visible, so it can dominate the decision. Still, a roof replacement is a system and a construction project. Ask clear questions about the material, installation plan, and documentation before treating the color as the only choice to resolve.

  • Product and scope: Make sure you understand which shingle product and color are included, along with the work covered by the estimate.
  • Roof condition: Ask what the inspection found and whether repair or replacement is being recommended. Photos can help you understand the condition rather than relying on a color discussion alone.
  • Installation details: Ask how the proposed work addresses the roof’s specific needs and applicable requirements. Do not infer installation quality from the color or appearance of a sample.
  • Warranty documents: Read the written terms and learn what applies to the product and workmanship. You can review North Wood’s information about roofing warranties and ask how the terms relate to the proposed project.
  • Options without pressure: You should have time to compare options and ask questions. A clear estimate helps you understand what is included without making a rushed color decision.

North Wood’s Roofing provides free roof inspections with clear photos and no-pressure options. The company is a veteran-owned residential roofing contractor serving Gainesville, Live Oak, Lake City, and North Florida. Learn more about the company’s owner-led local approach or review its roofing services before arranging an evaluation.

Should you follow neighborhood or association color rules?

Before ordering materials, check whether a homeowners’ association, community, or other applicable property rules place limits on roof colors or exterior changes. Requirements vary, so do not assume a color is allowed simply because another nearby home has it. Ask the relevant association or authority for its current written guidance and approval process, if one applies.

It can also help to consider the character of the street without treating neighborhood convention as a strict design rule. A color that coordinates with nearby homes may feel at ease in the setting, while a more distinct choice can still work if it suits the house and is permitted. Make sure the decision is based on your home and any actual requirements, not a guess about what others might prefer.

When is it time to ask a roofer for help?

Talk with a roofing contractor when you are planning a replacement, cannot tell whether the roof needs repair or replacement, or want to compare color choices for a specific shingle product. A roof evaluation can establish what work is appropriate before you spend time choosing among colors. For a leak or visible damage, focus first on the condition of the roof; color selection can wait until the repair or replacement plan is clear. See the company’s information on roof repair if you are dealing with a roofing issue.

If the roof is not ready for replacement, routine attention may still be useful. North Wood’s offers roof tune-ups; you can review the roof tune-up service to understand that option. An inspection can help distinguish a color-planning question from a maintenance or repair need.

Frequently asked questions about Florida shingle colors

Are light-colored shingles always better for a Florida home?

No. Light colors may reflect more sunlight than dark surfaces, but a home’s temperature depends on more than shingle color. The roof assembly and other parts of the home matter. Compare the appearance you want and ask a contractor about the specific product and broader roof system.

Do dark shingles make a roof unsuitable for North Florida?

Not automatically. A dark color may create the contrast you want, but color alone does not determine whether a roof is appropriate. Review the product, installation plan, and home’s needs. If heat is a concern, ask for a product-specific explanation rather than relying on a general rule.

Can I choose a roof color from an online photo?

Use online photos to narrow your choices, not to make the final selection. Screens can show colors differently, and outdoor light changes how a sample reads. Confirm the actual product color and view a physical sample beside the home when possible.

Should my roof match my siding?

It does not have to match exactly. Many homeowners choose a coordinated color or a deliberate contrast. Compare the roof with the full exterior palette, including trim and masonry, and check the result from the street.

What if I am unsure whether I need a repair or replacement?

Arrange an inspection before making a replacement color decision. A clear evaluation and photos can help you understand the roof’s condition and discuss appropriate next steps. Request an honest assessment rather than assuming a color change requires a full replacement.

Get a clear next step for your roof

Choosing the right shingle color starts with your home’s fixed exterior features, a real sample, and a view in different light. Then confirm any community requirements and make sure the product and roof work fit the home’s actual needs. A thoughtful comparison gives you a better basis for choosing than a name on a color card alone.

Schedule a free roof estimate

North Wood’s Roofing can inspect your roof, provide clear photos, and discuss options without pressure so you can make an informed decision.

Categories
Blog

What Maintenance Does a Metal Roof Need in Florida?

Metal roof maintenance Florida homeowners plan should focus on keeping drainage paths clear, checking visible roof details, and catching small changes before they turn into leaks. A metal roof does not need the same care as every other roof, and routine maintenance does not mean applying a coating or sealant on a schedule. In North Florida, heat, humidity, storms, trees, and wind-blown debris make a careful, ground-based check useful after severe weather and as part of regular home upkeep.

Request a free roof inspection

What maintenance does a metal roof need in Florida?

Most metal roofs benefit from simple, condition-based maintenance: keep gutters and drainage areas clear, look for visible damage or changes, and have roof details checked when there is a reason for concern. The exact needs depend on the roof system, its age, the surrounding trees, past repairs, and the manufacturer’s instructions. A homeowner can observe from the ground, but should leave roof access and repairs to a qualified professional.

Metal panels are only one part of a roof system. Flashing, fasteners or clips, penetrations, valleys, edges, and the layers beneath the panels all contribute to keeping water out. A roof can look fine from the driveway while a detail needs attention, so a visual check is not a substitute for an inspection when there are signs of water entry or storm damage. For background on metal roof components and installation, see the U.S. Department of Energy’s Building America Solution Center Metal Roof Installation Manual.

Why does North Florida weather affect maintenance?

Florida’s sun and heat expose a roof to repeated temperature changes. Humidity and rain make drainage important, while strong storms can move branches and other debris onto the roof or affect exposed edges and roof details. Homes near trees may need more frequent attention to gutters and valleys than homes with fewer overhanging limbs. Conditions vary from one property to another, including between Gainesville, Live Oak, Lake City, and communities in between.

That does not mean every metal roof needs frequent repairs or a special treatment. It means homeowners should base maintenance on what is actually happening at the home. A small amount of debris after a storm may be a simple cleanup issue; a panel that appears lifted, a new ceiling stain, or recurring water intrusion calls for a professional evaluation. Do not assume that a roof is safe or undamaged just because the metal surface is visible and intact from the ground.

What should you check from the ground?

Use a safe vantage point, such as the yard or a window, and binoculars if helpful. Do not climb onto a metal roof to inspect it. Metal surfaces can be slippery, especially when wet, and roof edges and ladders create fall hazards. Look for changes rather than trying to diagnose a roof system from a distance.

  • Panels and edges: Notice any panel that appears bent, lifted, displaced, or visibly different from neighboring panels. Do not press it or try to push it back into place.
  • Roof openings and transitions: Look around vents, skylights, chimneys, and places where roof planes meet for visible gaps, unusual staining, or loose-looking material. The roof detail itself may need closer assessment.
  • Gutters and downspouts: Check whether they appear blocked, sagging, or overflowing during rain. Leaves and other debris can restrict drainage, so clean gutters safely from the ground where possible or arrange suitable help.
  • Interior ceilings and attic, if safely accessible: Watch for new water stains, damp or musty areas, or signs that water has entered. Do not enter an unsafe attic or disturb wiring, insulation, or other hazards.
  • Nearby trees: Look for branches resting on or hanging close to the roof. Ask a qualified tree professional to address unsafe limbs rather than reaching from a ladder or roof.

These observations help you describe a concern; they do not confirm its cause. Water can travel before it becomes visible inside, and a stain may not be directly below the entry point. If you see a change, take a photo from a safe location and note when it appeared, especially if it followed a storm.

How often should you maintain a metal roof?

There is no one inspection calendar that fits every home. Follow the roof manufacturer’s care instructions and any guidance provided for the specific installed system. As a practical habit, look over the roof and drainage from the ground during ordinary home upkeep, and check again after a significant storm when it is safe to do so. Homes beneath trees or with recurring gutter clogs may need more frequent gutter attention.

A practical routine can be simple. When you are already doing seasonal home checks, scan the roof from a few safe viewpoints and see whether gutters are clear and firmly attached. After a storm, wait until conditions are safe before looking for changes; do not inspect during lightning, high winds, or while branches are unstable. If you notice something new, take a dated photo from the ground and compare it with an earlier one. If nothing has changed and there are no signs of water entry, continue following the roof system’s care guidance rather than adding unnecessary work.

Pay attention to recurring patterns. If one gutter section repeatedly overflows, note whether it happens during heavy rain or ordinary showers and whether debris is visible. If a ceiling mark returns after a repair, record the timing and location. These details can help a roofer understand the issue, though they do not identify the source on their own. A pattern of repeated concerns deserves a closer assessment instead of another round of guesswork.

Arrange a closer professional review if you observe damage, suspect a leak, have a repair completed, or are unsure about the condition of a roof detail. Do not wait for a scheduled annual date when water is coming in or a panel appears displaced. A professional can assess whether the concern is limited to a small repair or whether a broader evaluation is warranted. A roof repair evaluation can help determine the next step for a specific concern.

Which maintenance tasks can a homeowner handle?

Homeowners can do useful maintenance without stepping onto the roof. Keep an eye on gutters from the ground, remove loose debris from safe areas such as a porch or yard, trim vegetation only from a safe position, and keep records of visible changes. If gutter cleaning requires ladder work or access near a roof edge, hire someone equipped to do it safely.

Do not pressure-wash panels, scrape the finish, or apply paint, caulk, sealant, or a roof coating as a routine fix. A material that is appropriate for one system may be unsuitable for another, and covering a symptom can complicate diagnosis. Do not tighten or replace fasteners yourself: the right repair depends on the roof’s construction and the specific part that has changed. A roofer should identify the source of a problem before recommending a repair.

Gutters and downspouts are part of roof drainage, but they do not guarantee that every water or foundation concern will be prevented. Their condition and the way water flows away from the home matter. For more on keeping drainage components in view, see the company’s gutter services page. The City of St. Charles’ roof maintenance guidance also recommends attention to gutters, downspouts, flashing, and roof sheathing; follow the instructions for your own roof system and local conditions.

What does a professional metal roof inspection look at?

A useful inspection considers more than the broad visible surface of the panels. A roofing professional can look at the roof’s accessible details and assess whether there are signs of movement, damage, failed sealant, or water entry. Depending on the system and the concern, the review may include:

  • Panel alignment and visible damage, including areas affected by a branch or other impact.
  • Roof edges, valleys, transitions, and flashing around penetrations.
  • Exposed fasteners or other attachment details where the roof system uses them.
  • Gutters and drainage details that may be contributing to water backup or overflow.
  • Interior evidence or other clues that help locate a suspected leak.
  • Any previous repair area and whether the observed issue appears limited or more extensive.

The Building America Solution Center’s metal-roof technical guidance calls for roof-system flashings and accessories suited to the installation, underscoring why details around openings and transitions should not be ignored. An inspection should result in a clear explanation of observed conditions and practical options, not an automatic recommendation to replace a roof.

North Wood’s Roofing offers free inspections with clear photos and no-pressure options. The company serves homeowners in North Florida, including Gainesville, Live Oak, and Lake City. If you need a broader overview of available roof work, see metal roofing services and the roofing services page.

Maintenance, repair, or replacement: how do you decide?

A maintenance task addresses routine care, such as keeping drainage clear. A repair addresses a particular damaged or malfunctioning part. Replacement is a larger decision that depends on the overall condition of the roof, the extent of damage, repair history, and the homeowner’s plans. A single symptom does not by itself prove that a full replacement is necessary.

Situation Reasonable next step What to avoid
Gutters look clogged, but there is no sign of roof damage Arrange safe gutter cleaning and check drainage again during rain. Climbing onto the roof or assuming a gutter issue explains every water problem.
A new stain or drip appears indoors Document it and request a professional roof evaluation promptly. Applying sealant to a guessed location without finding the source.
A panel or roof edge looks displaced after a storm Keep away from the area and have the roof assessed safely. Walking on or trying to reattach the panel yourself.
There are several concerns or repeat leaks Ask for an assessment of the roof system and a written explanation of options. Assuming either that a patch will solve everything or that replacement is automatic.
No visible concern, but you want a condition check Follow the system’s care guidance and consider a professional inspection if uncertain. Adding coatings or treatments without a roof-specific reason.

For a repair or replacement decision, request an explanation of what was observed, what work is proposed, and why. Ask whether the concern relates to a particular roof detail or to broader conditions. Compare the scope of work, materials, and applicable warranty information rather than relying only on a brief verbal recommendation. North Wood’s Roofing also provides information about its roofing warranties; ask which terms apply to the particular project.

What should you do after a storm?

First, stay clear of downed power lines, unstable trees, and any visibly unsafe area. Do not climb onto a wet or damaged roof. From a safe location, take photos of visible debris or changes, note when the storm occurred, and check the interior for new water marks. If water is entering, protect belongings only when it is safe to do so and contact a roofing professional about the roof condition. Emergency measures should not create another hazard or conceal damage that needs assessment.

Do not assume that every storm requires a repair, but do not dismiss an apparent change because the roof is metal. If the roof is leaking or a panel looks out of place, ask for a prompt evaluation. For general warning signs, the guide to roof leaks in Florida can help you recognize when to investigate further. For a roof with no visible problem, record what you observed and continue with the roof system’s recommended care.

How can you keep useful maintenance records?

A simple record makes it easier to spot changes over time and explain a concern. Keep the installation and product documents if available, along with inspection notes, invoices, and information about previous repairs. Save dated photos taken from the same safe locations, and record the date of any notable storm or the first appearance of a leak. Note whether the issue recurred after a repair.

Use those records to ask specific questions: What area was inspected? What condition was found? Does the suggested work address the cause or only a visible symptom? Which product or repair method is appropriate for this particular roof? If you do not have documentation for the existing roof, say so rather than guessing about its materials or history. A contractor can base recommendations on what can be verified on site.

Frequently Asked Questions

Does a metal roof need to be resealed every year?

Not as a universal rule. Sealants and roof details vary by system and location, so follow the roof manufacturer’s instructions and have a qualified roofer assess a suspected failure. Applying sealant on a calendar without identifying a need can be inappropriate.

Can I walk on my metal roof to remove leaves?

It is safer not to. Metal roofs can be slippery, and the appropriate walking path, if any, depends on the roof design and system. Observe from the ground and arrange professional help for debris or access that cannot be handled safely without climbing.

Should I pressure-wash my metal roof?

Do not assume pressure-washing is suitable. It can create risks for the roof finish, details, or water entry, depending on the system and method. Check the manufacturer’s care instructions and ask a roofing professional before using a cleaning method on the roof.

Does a small ceiling stain always mean the metal panels are damaged?

No. A stain is evidence that needs investigation, not a diagnosis of the source. Water may enter at a roof detail or another location and travel before appearing indoors. Document the stain and request an evaluation rather than guessing at the repair point.

When should I request a metal roof inspection?

Request one if you notice a new leak, visible panel or edge movement, storm-related damage, recurring water problems, or an area you cannot assess safely. You can also ask for a condition review when you are unsure what maintenance the roof needs.

Get a clear assessment of your metal roof

Metal roof maintenance in Florida is mainly about safe observation, clear drainage, and timely attention to changes—not applying a one-size-fits-all treatment. Because roof systems and home conditions differ, an inspection can help distinguish routine upkeep from a repair that needs professional work. North Wood’s Roofing provides honest evaluations with clear photos and no-pressure options for North Florida homeowners.

Schedule a free roof estimate

Keep the roof manufacturer’s care information with your home records, and get a qualified evaluation if you see damage or signs of water entry.

Categories
Blog

What Should a Homeowner Do Before a Roof Replacement Starts? Roof Replacement Preparation Checklist

A roof replacement preparation checklist can help make the days before a project calmer and more predictable. Before work starts, confirm the project plan with your contractor, clear safe access to the home, protect items that could be affected by vibration or debris, and let everyone in the household know what to expect. North Florida weather can change quickly, so keep communication open and avoid assuming a start date cannot shift.

Schedule a free roof estimate

What should you confirm with your roofer first?

Preparation starts with the written scope and a clear conversation. Before setting out to move belongings, make sure you understand what work is planned and which parts of the property may be used. A replacement can involve deliveries, equipment, crew access, and debris collection. Your specific project plan should explain the arrangements for your home.

  • Confirm the work area. Ask which sides of the house need access and whether the driveway, a gate, or another area should remain clear.
  • Review the project scope. Make sure you know what roof system and work are included, what is excluded, and whom to contact with a question. If you are still comparing roof types, review the company’s pages on shingle roofs and metal roofs.
  • Ask about the expected sequence. Find out how the crew expects to begin, where materials may be staged, and how you will hear about schedule updates. Do not assume every project follows the same timeline.
  • Clarify access and communication. Confirm whether someone needs to be home, how the crew will enter any agreed work area, and the best way to reach your project contact during the work.
  • Keep your documents together. Save the proposal, scope, product selections, contact details, and any written updates where you can find them. If a detail is unclear, ask before work starts rather than relying on a guess.

A written plan is useful even when you already feel comfortable with the project. It gives you a shared reference for product choices, access, timing, and next steps. For a broader overview of replacement decisions, see this homeowner’s guide to roof replacement. North Wood’s Roofing offers free inspections and estimates with clear photos and no-pressure options, so homeowners can ask questions before deciding how to proceed.

How should you prepare the outside of your home?

Roof work takes place above and around the house. Items in the yard, near exterior walls, or in the driveway may be exposed to falling debris or may get in the way of equipment and cleanup. Your contractor can tell you where the crew expects to work; use that information to decide what to move and where.

  • Move vehicles out of the work area. Ask where the crew and delivery vehicles need room, then relocate cars, bikes, and trailers before the agreed arrival time. If you need a vehicle during the day, plan where it can remain accessible without blocking work.
  • Clear patios and the area near the house. Move chairs, grills, planters, toys, and other portable items away from the roof edges and the contractor’s designated work zone. Do not place belongings under a spot where materials may be handled.
  • Protect or relocate delicate landscaping items. Move pots, decorations, and movable yard features. For fixed plants or features you are concerned about, point them out and ask the contractor what precautions are appropriate; do not assume every item can be protected in the same way.
  • Secure gates and plan for pets. Tell the crew about access instructions and keep pets away from active work areas. Arrange a secure indoor space or another suitable plan for animals that may be startled by noise or movement.
  • Keep walkways clear. Make it easy to get from the street or driveway to the agreed access point. Remove hoses, cords, and other trip hazards from routes people may use.

Do not move heavy or fixed objects into a new area without checking that it will not interfere with the planned work. A short conversation about staging and access can prevent last-minute confusion. The specific setup varies by property, roof shape, and project, so follow the arrangements confirmed with your contractor rather than copying a neighbor’s setup.

What should you move or protect inside?

Roof replacement work can create noise and vibration. The amount a homeowner notices indoors depends on the home and the work taking place. A little preparation can protect fragile belongings and make the day easier, especially if people will be working or studying at home.

  • Take down fragile wall items. Consider removing framed pictures, mirrors, shelves, or delicate decorations from rooms directly below the roof or near the ceiling. Store them somewhere secure until the work is complete.
  • Clear storage areas beneath the roof if asked. If your contractor requests access to an attic or another interior space, confirm what area is needed and whether you should move stored items. Cover or relocate belongings only as advised for the specific project.
  • Protect items that could shift. Secure objects on shelves and move breakables away from edges. If you have a particularly fragile item or a concern about a room, mention it before the crew begins.
  • Plan around noise. If anyone in the household works remotely, studies, naps, or needs a quiet environment, consider arranging a different location for the noisiest part of the day. Ask the contractor what timing information is available, while recognizing that weather and job conditions can affect plans.

These are sensible precautions, not a prediction that something inside your home will be damaged. You do not need to empty every room automatically. Ask what is relevant to your home and the planned work, and document any special instructions you agree on.

How can you plan for household routines and safety?

Think through the practical details for everyone who will be home. Work above the house can bring unfamiliar sounds and activity, and the safest choice is to keep household members and visitors out of active work areas.

  • Set expectations with household members. Explain when work is expected, which entrances or areas may be affected, and where people should stay clear. Give children a simple, age-appropriate reminder that the work zone is not a place to play.
  • Make a pet plan. Keep pets indoors or arrange another secure option away from the work area. Let the contractor know about pets, gates, and any access details that matter.
  • Consider deliveries and appointments. Reschedule nonessential visitors or deliveries that would compete for driveway or entry access. If a medical, caregiving, or other essential appointment must happen at home, tell your project contact early so access can be discussed.
  • Keep emergency routes usable. Do not block doors, paths, or access your household may need. Follow any site-specific directions from the crew about where people can safely walk.
  • Plan for a change in schedule. Heat, rain, storms, or other job conditions may affect outdoor work. Keep your phone available for updates and avoid making plans that depend on an unconfirmed completion time.

Never climb onto the roof or enter an active work zone to check progress. If you have a question, contact the project lead and wait for a safe response. A clear point of contact helps you get an answer without interrupting work or putting anyone at risk. If another home project is scheduled around the same time, tell both parties and ask whether their work areas or access needs could conflict. This is especially useful when a driveway, side yard, or exterior entrance will be shared. Avoid scheduling deliveries or outside work that depends on an exact roofing completion time unless the roofing contractor has confirmed the timing. If you have concerns about an existing feature near the roof, such as a delicate fixture or a recently completed exterior improvement, point it out before work begins and ask how it should be handled. Keep any agreed instructions in writing so everyone has the same understanding. If a new condition or a question about the planned work comes up during the project, direct it to your project contact rather than asking crew members to make an unconfirmed change. Clear communication helps keep the work coordinated and gives you a record of what was discussed.

What questions should you settle before the start date?

Use the days before the project to resolve details that could otherwise become stressful once the crew arrives. This does not mean predicting every job condition. It means agreeing on the basics and understanding how changes will be communicated.

Topic What to confirm What you can do
Schedule Planned arrival window, expected start, and how weather-related changes will be shared Keep your contact details current and watch for updates
Access Driveway, gate, and property areas the crew may need Move vehicles and clear agreed routes
Materials Selected roofing material and any documented product choices Keep the written selection with your project papers
Work scope Included work, exclusions, and who answers questions about changes Ask for unclear items to be explained before the start
Household logistics Whether anyone needs to be home and any access or safety instructions Plan for children, pets, remote work, and appointments
Closeout How you will receive project updates and discuss completion or follow-up questions Save the contact information and relevant documents

Use the table as a conversation guide, not a substitute for your agreement. If you are considering financing, review the available information and ask which terms apply to your project; do not assume that a particular option fits your circumstances. North Wood’s Roofing has a financing information page for homeowners who want to explore that topic. You can also review the company’s warranty information and ask how the documents for your selected roof apply to the work being proposed.

What should you do if the weather changes?

North Florida’s heat, humidity, and storms make weather an important scheduling consideration. A planned date is not a guarantee that outdoor work can safely proceed on that day. If conditions change, ask your contractor how you will receive an update and what the revised plan is. Keep household preparations flexible until the crew confirms timing. For official local forecasts, check the National Weather Service as well as updates from your contractor.

Before the start, secure loose outdoor belongings and check that your contact information is current. If rain or a storm is forecast, avoid assuming the project is canceled or proceeding until you hear from the contractor. Do not cover or alter the roof yourself. If you notice a leak or a new concern while waiting, report it promptly and ask what to do; for repair needs, review the company’s roof repair service information.

What is a simple roof replacement preparation checklist?

As the start date approaches, use this short list to check that the main arrangements are covered:

  1. Read the written scope and confirm material selections, access arrangements, and your point of contact.
  2. Ask how the schedule may change and how updates will be shared.
  3. Move vehicles, portable outdoor belongings, and items from the agreed work area.
  4. Secure pets, plan for children and visitors, and keep access routes clear.
  5. Move or secure fragile indoor items where noise or vibration may be a concern.
  6. Save the proposal, product details, contact information, and written updates together.
  7. Wait for the contractor’s instructions if a question, weather change, or unexpected condition comes up.

You do not need to manage the roofing work yourself. Your job is to understand the plan, prepare your household, communicate concerns, and stay clear of the work area. Ask the contractor about anything specific to your property rather than relying on a generic list.

Contact North Wood’s Roofing with questions about your project

Frequently Asked Questions

Do I need to leave my home during roof replacement?

Not necessarily. Whether staying home is practical depends on your household needs and the planned work. Expect noise, keep away from active work areas, and ask your contractor whether anyone needs to be home for access or communication.

Should I empty my attic before work begins?

Do not assume the entire attic must be emptied. Ask whether access is needed and whether any particular stored items should be moved or covered for your project. Follow the specific instructions you receive.

What should I do with my car and outdoor furniture?

Move vehicles from the areas needed for access, materials, and equipment. Relocate portable furniture and other belongings away from the agreed work zone. Confirm the locations with your contractor before the crew arrives.

What if the roof replacement date changes because of weather?

Keep your preparations flexible and follow the contractor’s updates. Ask how schedule changes will be communicated, and wait for confirmation before making assumptions about whether work will proceed.

Get a clear plan before work begins

A well-prepared homeowner knows what work is planned, where access is needed, what belongings to move, and whom to contact with questions. For a project-specific evaluation or estimate, North Wood’s Roofing serves homeowners in Gainesville, Live Oak, Lake City, and surrounding North Florida communities with a straightforward, no-pressure approach.

Categories
Blog

Emergency Roof Repair in Gainesville FL: Leak Steps

A roof leak after a Gainesville storm can feel urgent, but the safest first move is to protect people and belongings rather than climb onto the roof. Move valuables away from the drip, place containers under active leaks, and take photos from the ground when conditions are safe. If wind, downed lines, structural damage, or standing water creates a hazard, stay clear and follow official safety guidance.

Request a free honest inspection or emergency roof repair evaluation.

Emergency roof repair in Gainesville FL starts with safe indoor leak control, temporary protection, and a professional evaluation of the roof covering, structure, and connections. Acting promptly can limit additional water damage while you determine whether the problem needs immediate stabilization or a scheduled repair.

Florida’s wind and wind-driven rain can expose weaknesses that are not obvious from inside the home. The Florida Hurricane Retrofit Guide explains how roof components work together, while our guide to storm-damage roof-repair steps offers broader context. Start with the practical actions to take when water first appears.

How Emergency Roof Repair in Gainesville FL Stops an Active Leak

When water is coming through the ceiling, focus first on protecting people and limiting interior damage. Do not climb onto the roof to look for the entry point, especially after wind or storm damage. A roof can have concealed damage to its covering, sheathing, framing, or connections, even when the visible problem looks small.

Contain the water and protect the room

Place buckets or clean containers under active drips, and move furniture, electronics, clothing, and other belongings away from the wet area. If water is collecting in a ceiling bulge, keep people out from underneath it and do not puncture it. Wet drywall and insulation can become heavier as they absorb water, so a sagging ceiling deserves caution rather than a hands-on fix.

Use towels or plastic sheeting on the floor to reduce spreading water, but avoid creating a slipping hazard. If water is near a light fixture, outlet, appliance, or other electrical equipment, do not touch the wet items. Turn off power to the affected area only if you can reach the breaker from a dry, safe location without stepping through water. Otherwise, leave the area and contact a qualified professional or the appropriate emergency service.

Document the leak without taking risks

From a safe position, take photos or video of the dripping water, stains, damaged ceiling, and affected belongings. Note when you first noticed the leak and whether it changes during rain or wind. These details can help a roofer distinguish active water intrusion from older staining and plan a more useful inspection. For additional indicators to watch from ground level, review these signs of a roof leak.

Florida roofs take the brunt of wind forces and wind-driven rain. The Florida Hurricane Retrofit Guide explains that roof covering is the home’s first defense against wind and water, and that covering damage can allow substantial water damage during later rainstorms. It also notes that initial intrusion and later leakage can contribute to mold problems. Keep the area as dry as practical and arrange an evaluation rather than assuming the leak has stopped permanently.

If you see a downed power line, smell gas, notice major structural movement, or cannot safely remain in the affected area, leave and follow local emergency guidance. The National Weather Service warns that fallen power lines may still be live and should not be approached. Once conditions are safe, a local, photo-documented inspection can identify the next repair step without asking you to guess from the ground.

How to Temporarily Protect Your Home Until Help Arrives

  1. Get everyone to a safe area first. If high winds or severe weather are still happening, do not inspect the roof or go outside to place a tarp. Move into a sturdy building and, during a high wind warning, use an interior room or basement. If you are in a mobile home, move to a sturdy building before conditions worsen. Follow updates from local officials, local news, or NOAA Weather Radio. See the National Weather Service wind safety guidance.
  2. Keep away from electrical and structural hazards. Do not approach a downed power line, even if it appears inactive. Power lines on the ground may still be live. Stay away from damaged trees, sagging ceilings, shifted walls, standing water near electrical equipment, and any area that seems unstable. If you smell gas, see major structural damage, or authorities have not declared the building safe, leave and follow emergency instructions. The National Weather Service post-storm guidance covers these hazards.
  3. Control interior water without climbing. Place buckets or containers under active drips, move furniture and valuables away from the leak, and use plastic sheeting indoors to protect belongings if it can be done safely. Do not cut into a ceiling that is bulging or heavily saturated. Take photographs from a safe location for your records, but never walk on a damaged roof or enter an unsafe attic.
  4. Use safe lighting and backup power. Use battery-powered flashlights rather than candles. Never operate a portable generator inside a home, garage, porch, or other enclosed area. Keep generators away from doors and windows according to the manufacturer’s instructions, and follow local emergency guidance.
  5. Dry wet materials promptly. Once the area is safe, remove standing water and begin drying water-damaged surfaces and belongings. The EPA identifies moisture control as the key to mold control and recommends drying wet areas and items within 24 to 48 hours when possible. Read the EPA guide to mold, moisture, and your home. If water continues entering, focus on keeping people safe and arrange a professional evaluation rather than attempting an exterior patch during unsafe weather.

Common Causes of Emergency Roof Leaks in Florida

Florida roofs regularly face strong winds and wind-driven rain, so a small weakness can become an active leak during or after a storm. The Florida Hurricane Retrofit Guide explains that a roof includes more than its visible covering. The covering, supporting structure, and connections between the roof and walls all help keep water out. Damage in any of these areas can contribute to water intrusion.

Wind-driven rain

Rain pushed by wind can reach vulnerable edges, seams, valleys, and other areas that may handle ordinary rainfall without a problem. If roof covering or flashing has already loosened, wind can force water beneath the surface. Roof-cover damage may also allow more water into the home during later rainstorms, not just during the original weather event. Florida’s roof and wind guidance explains this connection.

Lifted or missing roof covering

Shingles, panels, or other roof-covering materials can lift, crack, break, or go missing. That exposed area may let rain reach the underlayment, sheathing, or attic. A roof can look mostly intact from the ground while still having a small damaged area that leaks when rain returns. Do not climb up to check it yourself, especially after high winds.

Flashing and penetration failures

Flashing helps direct water around roof transitions, walls, chimneys, vents, and other penetrations. Seal failures, loose flashing, or damage around a penetration can create a path for water. These leaks may appear far from the original entry point, because water can travel along the underside of the roof or through framing before reaching a ceiling.

Debris, tree impact, and aging materials

Branches and storm debris can puncture or displace roof materials. Older materials may also have less remaining resistance to repeated heat, humidity, rain, and wind. The cause is not always visible from indoors, so a careful inspection is important before choosing a repair.

Acting on active water intrusion matters even after the rain stops. The Florida guide notes that initial intrusion and later leakage can contribute to mold problems. The EPA’s moisture guidance identifies moisture control as the key to mold control and recommends drying water-damaged areas and items within 24 to 48 hours when possible.

When to Call for Emergency Repair vs. Scheduling a Standard Inspection

How urgent is the problem? Use the condition of the home, not the label on a storm, to decide what happens next. Ongoing water intrusion can worsen with the next rain, while a small stain from an old, dry leak may call for a prompt inspection rather than immediate emergency work. Do not climb onto a damaged roof to investigate.

Roof problem triage guide

What you notice Best next step Why it matters
Water is actively entering, ceilings are bulging, or rain is reaching walls, wiring, or insulation. Move people and valuables away from the area, contain water from the ground, and seek emergency roof repair guidance. Roof-cover damage can allow substantial water damage during later rainstorms, and initial or later leakage can contribute to mold. Florida’s Hurricane Retrofit Guide explains this risk.
You see a downed power line, smell gas, see major structural movement, or the home may be flooded or unsafe. Leave the unsafe area and contact the appropriate emergency authority or utility. Do not approach wires or re-enter until officials say it is safe. The National Weather Service warns that lines on the ground may still be live and advises checking for gas leaks and structural damage after a storm. Review its high-wind safety guidance.
A storm has removed or lifted roof materials, dropped a branch, or exposed part of the roof, but there is no active indoor leak. Arrange a professional storm-damage evaluation as soon as conditions are safe. Read about storm damage roof repair steps. Damage that is not leaking yet can still admit water during the next storm. Avoid walking the roof or attempting a temporary repair yourself.
You notice an old ceiling mark, missing-looking material from the ground, granule buildup, or a recurring concern with no active water. Schedule a standard inspection and document what you have seen. A photo-documented evaluation can help clarify whether repair or further monitoring is appropriate. Use this guide to review common signs of a roof leak. North Wood’s Roofing provides Gainesville roof repair services with owner-led, no-pressure recommendations.

If you are unsure which category fits, describe what you can safely see from inside or at ground level, including whether water is still entering. A professional can help determine the next step without asking you to diagnose structural damage yourself.

What Emergency Roof Repair Costs in North Florida

There is no useful one-size-fits-all price for emergency roof repair in North Florida. The cost depends on what is happening at the home and what it takes to make the property safe and dry. A small, accessible leak may call for a different response than storm damage that has affected the roof covering, underlying materials, or interior.

Several factors commonly shape the scope of the work:

  • Location and extent of the intrusion: Water entering near a simple roof penetration can require a different repair than widespread wind or tree damage. The visible drip may not be directly below the roof opening, so the source needs to be evaluated rather than assumed.
  • Accessibility and materials: Steep or difficult-to-reach areas can require additional safety planning. The type and condition of the existing roofing, flashing, decking, and related materials also affect the repair approach.
  • Temporary stabilization: If permanent work cannot happen immediately because of weather, safety conditions, or material needs, temporary protection may be part of the initial response. That work addresses immediate exposure, but it does not necessarily resolve the underlying roof problem.
  • Interior damage: Wet insulation, ceilings, walls, flooring, or personal belongings may require attention separate from the roof repair itself. The EPA identifies moisture control as central to mold control and recommends drying water-damaged areas and items within 24 to 48 hours when possible.
  • Repair versus replacement: An inspection may show that a localized repair is appropriate, or that the roof’s age, condition, and damage make broader replacement worth discussing. These are different projects with different scopes.

For more context, review these roof replacement cost factors and Gainesville roof replacement estimates. A careful evaluation should identify the source of the intrusion, document visible conditions, and explain practical options without pressure. Avoid choosing a contractor based only on a quick number before the damage and needed scope are understood.

Why Fast Access Matters During Storm-Season Roofing

Storm damage can change quickly. A small opening may allow more wind-driven rain into the attic or living space during the next weather event, while wet materials and belongings become harder to protect over time. Fast access does not mean taking unnecessary risks. During lightning, high winds, flooding, or other unsafe conditions, stay inside and wait for a safe window rather than asking anyone to work on an exposed roof.

Questions to ask an emergency roofer

When you call, ask what the initial visit includes and whether the goal is inspection, temporary stabilization, permanent repair, or some combination. Ask how weather and site conditions affect when someone can safely evaluate the roof. You can also ask what information the contractor needs, such as photos taken from the ground, the location of visible water, and when the damage occurred. A clear answer helps you distinguish practical next steps from a rushed sales pitch.

Keep safety concerns in the conversation. The National Weather Service warns that downed power lines may still be live and should not be approached. After a storm, avoid entering a building that may be structurally unsafe, has a gas odor, or has not been cleared by authorities. These conditions need attention before roofing work begins.

A careful inspection supports better decisions

North Wood’s Roofing provides residential roof repairs for homeowners in Gainesville, Live Oak, and Lake City. Its owner-led approach includes photo-documented inspections and transparent, no-pressure recommendations, giving homeowners a clearer view of what was found and which options may make sense. That is useful during storm season, when urgency should not replace careful evaluation. Learn more about the company’s roof repair services in Gainesville and nearby North Florida communities.

If a leak is active or storm damage has left your home exposed, a professional evaluation can help clarify the safest next step. North Wood’s Roofing can review the situation and explain practical repair options without pressure. To request an evaluation, contact us online.

Frequently Asked Questions

How urgent is roof repair after a leak?

Treat an active leak, spreading ceiling stain, sagging drywall, or water near electrical fixtures as a prompt safety issue. Move people and valuables away from the area, place a container under the drip if it is safe, and avoid climbing onto the roof. If water is near electrical equipment, turn off power to the affected area only when you can do so safely, or contact an electrician or emergency service for guidance.

What should I do if I cannot afford to fix my roof right away?

Start with a professional evaluation so you understand the immediate risk and which work is truly necessary. Ask for the condition to be documented with photos and for the options to be explained in order of urgency. Temporary protection may help limit additional interior damage, but it should not be treated as a permanent repair. Avoid committing to work you do not understand.

How much does emergency roof repair cost?

There is no reliable flat price for emergency repair. The cost can depend on where the damage is, how much water is entering, roof access, materials, temporary stabilization, interior damage, and whether the lasting solution is a repair or replacement. A site evaluation and clear written scope can help you compare the immediate work with longer-term recommendations.

Can I get my roof replaced for free in Florida?

Free roof replacement should not be assumed. Be cautious of advertisements that promise a no-cost replacement without clearly explaining eligibility, funding, insurance requirements, or the work agreement. A reputable contractor can inspect the roof, document its condition, and explain practical repair or replacement options without pressure.

Schedule an Emergency Roof Evaluation

If a leak is active or storm damage has left your home exposed, a professional evaluation can help clarify the safest next step. North Wood’s Roofing can review the situation and explain practical repair options without pressure. To request an evaluation, contact us online.

Categories
Blog

How to Tell If Your Roof Has Storm Damage After a Hurricane

Hurricane roof damage is any wind, rain, hail, debris, or fallen-limb damage that changes how your roof sheds water or protects your home. You can spot warning signs from the ground and inside a safe attic, but a ground check cannot rule out hidden damage.

Request a free, photo-documented roof inspection from North Wood’s Roofing for an honest evaluation and clear next-step options.

After a storm, the roof may look mostly normal from the street even when a shingle edge, flashing joint, vent, or roof penetration has been disturbed. Start with safety, observe what you can without climbing, record the condition before cleanup, and get professional help when the signs point to a problem. For the broader repair process, see North Wood’s Roofing’s storm damage roof repair guide.

Safe Ways to Inspect Your Roof After a Storm Without Climbing Up

A safe post-hurricane roof inspection begins at ground level. Wet surfaces, loose materials, hidden structural damage, downed wires, and unstable trees can turn a quick look into a serious hazard. Your goal is not to diagnose the roof from a ladder. Your goal is to decide whether the roof needs a professional inspection and to preserve useful evidence.

Start with the property, not the roof

  • Wait until high winds, lightning, flooding, and nearby hazards have passed.
  • Stay away from downed power lines, damaged utility equipment, unstable trees, and standing water near electrical systems.
  • Do not walk beneath a visibly sagging roof edge, leaning tree, or loose section of siding.
  • Keep children and pets away from roofing pieces, broken glass, nails, and storm debris.

Use a ground-level view

Walk the perimeter only when the yard is safe. Use binoculars or your phone camera zoom instead of a ladder. Look at the roofline from several angles and compare it with older photos if you have them. Note changes around valleys, eaves, vents, skylights, chimneys, wall intersections, gutters, and downspouts.

Check the interior only when it is safe

If there are no electrical or structural hazards, look for new water stains, damp insulation, musty odors, dripping, or daylight in the attic. Do not enter an attic with a sagging ceiling, active electrical concern, standing water, or signs that the structure is unstable. Never climb onto a wet or damaged roof to confirm what you see from below.

Signs of Storm Damage You Can See from the Ground

Visible hurricane roof damage often appears as a change in the roof’s pattern, edge, or surrounding drainage system. A single sign may justify an inspection, especially when it appeared after the storm. The table below is a screening guide, not a repair diagnosis.

What you may notice What it may indicate Next step
Missing, lifted, curled, cracked, or creased shingles Wind movement, impact, or a disturbed seal Photograph the area from the ground and schedule an inspection
Shingle pieces, metal, or fasteners in the yard Roof covering or flashing may have separated Keep people away from debris and save it if safe
Uneven roofline or loose edge Damage to roof covering, edge metal, decking, or supporting materials Do not approach the area; request professional assessment
Bent vents, flashing, gutters, fascia, or downspouts Impact or wind damage around the roof system Photograph the whole elevation and the close detail
New granules gathered in gutters or at downspouts Possible surface loss from shingle impact or abrasion Record where the material collected and ask for an inspection
Branches resting on the roof or puncture marks Impact damage that may allow water into the roof assembly Stay clear and arrange safe debris removal and roof review

Do not assume a roof is undamaged because no shingles are visible on the ground. Wind can disturb a fastening point or flashing transition without removing a large piece. A small opening can also stay dry until the next rain arrives from the right direction.

Look for changes around roof penetrations

Roof vents, pipe boots, skylights, chimneys, and wall intersections are places where separate materials meet. From the ground, look for a tilted vent, missing cap, displaced flashing, lifted sealant, or a gap that was not present before the hurricane. Do not touch loose components or place a ladder against the roof to get closer.

Inspect the drainage path

Gutters and downspouts are not the roof covering, but storm damage can affect the complete water-shedding path. Look for a detached gutter, bent downspout, damaged fascia, unusual sagging, or roof material blocking an outlet. Keep performance claims qualified: a clean, connected drainage system helps direct water away from the roof edge, but it cannot correct damage higher on the roof.

What Hidden Storm Damage Looks Like Inside Your Attic

Hidden hurricane roof damage may show up indoors before it is visible outside. Water stains, damp insulation, musty odors, drips, or daylight through the roof deck can point to a breach or failed transition. Interior signs can also have other causes, so use them to trigger a professional assessment rather than attempting a roof repair yourself.

Signs to record

  • New brown or discolored ceiling and wall marks after the storm.
  • Wet insulation, damp roof decking, or a musty smell in the attic.
  • Drips or fresh moisture around vents, skylights, chimneys, or exterior walls.
  • Daylight visible through a location that should be covered.
  • Ceiling material that is sagging, bulging, or separating.
  • Water that appears far from the visible exterior roof sign.

Water can travel along framing or insulation before it becomes visible. That is why the location of an indoor stain may not identify the source. Do not cut into a ceiling, move unstable materials, or enter a risky area to trace a leak. If water is near an electrical fixture, keep clear and contact the appropriate emergency professional.

Have a new leak or visible roof concern? North Wood’s Roofing can help evaluate the condition and explain repair options without pressure.

Which Roof Damage Requires Professional Assessment?

Professional assessment is the right next step when storm damage affects the roof covering, edge, flashing, drainage, attic, or interior ceiling, or when you cannot inspect safely. A roofer can review areas that are not visible from the ground and document findings with clear photos. If you are unsure, treat the question as a reason to schedule an inspection rather than a reason to climb.

Call for an inspection when you see

  • Missing, lifted, creased, cracked, or visibly displaced roofing materials.
  • New leaks, damp insulation, water stains, or daylight in the attic.
  • A sagging ceiling, uneven roofline, or suspected roof-deck damage.
  • Damage around a skylight, chimney, vent, pipe boot, or wall intersection.
  • Branches, metal, or other debris that struck or remains on the roof.
  • Loose gutters, fascia, soffit, or edge materials after the storm.
  • Any condition you cannot reach or evaluate without a ladder or roof access.

For urgent life-safety hazards, use emergency services first. For a roof concern that is not an immediate emergency, choose a licensed and insured contractor who will explain what the photos show, separate temporary protection from permanent work, and provide clear next-step options. North Wood’s Roofing serves homeowners in Gainesville, Live Oak, Lake City, and nearby North Florida communities.

How to Document Damage for an Insurance Claim

Good documentation creates a clear record of what changed and when. It does not decide whether a claim is covered. Coverage, deductibles, exclusions, notice requirements, and claim decisions depend on your policy and insurer, so review your policy and contact the carrier for claim instructions.

Record the condition before cleanup

  1. Take wide photos showing each affected side of the home and the surrounding yard.
  2. Take closer photos of missing materials, lifted edges, debris, stains, gutters, and interior damage.
  3. Capture short videos when they show movement, dripping, or the location of a problem better than a still image.
  4. Write down the date of the storm, when you noticed the change, and which rooms or roof areas are affected.
  5. Keep a simple list of damaged or missing property, and save receipts for reasonable emergency steps.
  6. Keep copies of inspection reports, estimates, invoices, correspondence, and photos in one folder.

Do not make a permanent repair solely to improve a claim or remove evidence that an inspector needs to see. Take reasonable steps to reduce additional damage only when they are safe and permitted by your insurer. Moving belongings away from a leak may be reasonable; climbing onto the roof to apply a tarp is not a safe do-it-yourself shortcut.

Use older photos as a comparison

Photos taken before the storm can help show whether a shingle, vent, gutter, or roof edge changed. Use them as context, not as proof of a coverage decision. A qualified roofing professional can compare the visible condition with the roof system and provide photo documentation for your records.

What to Do in the First 24 Hours After a Major Storm

The first day is about safety, observation, documentation, and preventing avoidable additional damage. Move through these steps in order:

  1. Confirm that people are safe. Leave areas with downed wires, unstable trees, a sagging ceiling, flooding, or other immediate hazards.
  2. Wait for safe conditions. Do not inspect during lightning, high winds, or active flooding.
  3. Observe from the ground. Use zoom or binoculars and avoid ladders, roof access, and loose debris.
  4. Check safe interior areas. Look for new moisture or stains without entering unstable spaces.
  5. Document before cleanup. Photograph the roofline, yard, gutters, attic signs, ceilings, and damaged belongings.
  6. Contact your insurer if you plan to file. Ask what notice, documentation, and temporary protection steps your policy requires.
  7. Arrange a professional roof inspection. Ask for clear photos, a written explanation, and options that distinguish urgent protection from permanent repair.

For future preparedness, NOAA recommends keeping a home in good repair and strengthening vulnerable areas before a hurricane. Read the NOAA hurricane home-preparedness guidance for planning information. Preparation does not replace a post-storm inspection when the roof shows new warning signs.

Contact North Wood’s Roofing for a free roof inspection with clear photos and honest next-step options after a hurricane.

Frequently Asked Questions About Hurricane Roof Damage

How can I tell if my roof has storm damage after a hurricane?

Look from the ground for missing or lifted shingles, exposed areas, bent flashing or vents, damaged gutters, debris impact, an uneven roofline, or new granules in drainage areas. Then check safe interior spaces for new stains, damp insulation, drips, musty odors, or daylight. These signs justify a professional inspection, even if the roof looks mostly intact.

Should I climb on my roof to look for hurricane damage?

No. A wet, damaged, or debris-covered roof can be unsafe, and climbing can worsen damage. Use a ground-level view, binoculars, or camera zoom. Have a qualified professional inspect roof surfaces, flashing, penetrations, and areas that cannot be evaluated safely from the ground.

Can a roof leak after a hurricane even if I do not see missing shingles?

Yes. Water can enter through disturbed seals, flashing, vents, fasteners, or small openings that are hard to see from the street. Check safe attic and living-space areas for new moisture, but do not cut into ceilings or enter an unstable area to trace a leak.

What should I photograph after hurricane roof damage?

Photograph wide views of each side of the home, close views of visible roof and gutter changes, debris, interior stains, attic moisture, and damaged belongings. Record when you noticed the problem, and save inspection reports, estimates, receipts, and insurer communications.

Does a professional inspection guarantee that insurance will pay for repairs?

No. A roofing inspection can document observed conditions and explain repair needs, but coverage depends on your policy, the cause of loss, exclusions, deductibles, notice requirements, and your insurer’s claim decision. Ask your insurer for claim instructions and keep your roofing documentation with your records.

Get a Clear Next Step After the Storm

A ground-level check can help you recognize hurricane roof damage, but it cannot confirm that a roof is safe or watertight. If you see new warning signs, document them without taking risks and arrange a professional evaluation. North Wood’s Roofing provides free, photo-documented inspections for homeowners who want an honest assessment and no-pressure options. Visit the North Wood’s Roofing team page to learn more about the local, owner-led approach, or request an inspection.

Categories
Blog

Roof Financing in Florida: Options for Homeowners

A roof problem rarely arrives at a convenient time. In North Florida, heat, storms, and humidity can turn a small concern into a larger roofing project. So homeowners often need to weigh both urgency and budget before deciding how to move forward.

Need a clearer starting point? Request a free, honest roof inspection or estimate and ask about available third-party financing options for your project.

Roof financing can help spread the cost of a necessary repair or replacement. But the right choice depends on the project scope, your available cash, the lender’s terms, and your long-term plans. Cash may be the least expensive way to fund improvements, while a bank, other lender, or third-party contractor financing may help preserve emergency reserves. The U.S. Department of Housing and Urban Development recommends understanding all project costs before work begins.

That does not make borrowing automatically better than paying cash, and it does not mean every offer fits every homeowner. Start by understanding what the roof actually needs, then compare how each payment approach could affect your household finances. The complete roof replacement guide can help you understand the work before you compare payment paths. The first step is seeing why a manageable funding plan may matter when a major roofing project cannot wait.

Why Roof Financing Can Help With a Major Roofing Project

A roof problem rarely arrives at a convenient time. If inspections show that replacement or substantial repair is needed, delaying the work can leave your home exposed to additional weather damage. The first step is to understand the roof’s condition and the full project scope, then decide how to pay for work that your household needs. The complete roof replacement guide can help you understand the work before you compare payment paths.

Paying with cash is generally the thriftiest way to fund a home improvement, according to the U.S. Department of Housing and Urban Development. Cash avoids borrowing costs, but using your available reserves may leave less room for other essential expenses, emergencies, or planned repairs. Before committing funds, review the materials, labor, disposal, related repairs, and other project costs so the decision is based on the complete scope. You can review the Florida roof replacement estimate factors that may affect a roofing project in this market.

Roof financing may help when the work is important but paying the entire cost at once would place too much strain on your reserves. HUD notes that homeowners who do not have enough cash may apply through a bank or another lender. That does not make financing automatically better than cash. It means you can compare the cost of borrowing with the value of keeping more money available for household needs.

Contractor-connected financing can also be convenient, but it should be compared with other available options before you decide. NerdWallet recommends reviewing rates and terms across choices. North Wood’s Roofing can explain the roofing scope and available third-party financing options for homeowners in Gainesville, Live Oak, Lake City, and nearby North Florida communities. The lender, not the roofing contractor, determines the financing terms and approval.

Which Roof Financing Options Can Florida Homeowners Compare?

The right choice depends on the amount you need to borrow, your available reserves, and the terms you can manage. HUD notes that the best loan type depends primarily on the amount borrowed. So compare the funding method with the actual roofing scope rather than choosing a product based only on a contractor’s recommendation.

Common ways to plan for a roof project
Option How it generally works Questions to consider
Cash Use savings to pay for the work without borrowing. Will paying cash leave enough reserve for other home, storm, or household needs?
Personal loan Borrow through a bank or other lender, with structures that vary by lender. Some loans use fixed rates, while others may be variable. What are the repayment terms, fees, rate structure, and total cost?
Home equity loan or HELOC A home equity loan may provide a set amount. A HELOC is a credit line you draw from as needed and repay with interest. How could using home equity affect your property, repayment obligations, and future plans?
FHA-related option FHA Title I may be a possible option when equity is limited. FHA 203(k) insures certain mortgages that combine purchase or refinancing with rehabilitation. Does the specific program apply to your situation, home, and project? Confirm current requirements with an eligible lender.
Contractor-connected financing A roofing contractor may connect homeowners with third-party financing providers. North Wood’s Roofing is not the lender, and availability or qualification varies. Can you compare the offer with independent options, including its complete repayment terms and fees?

Material selection affects project scope, but it should not be confused with the financing decision. If you are comparing shingle roof options or metal roofing options, ask for a clear estimate that explains the proposed work and materials before discussing how to pay for it. HUD also recommends understanding all project costs before beginning improvements.

Approval, availability, qualification, and repayment requirements vary. Read each offer carefully and compare the full terms, not just the convenience of applying through a roofing company. HUD’s guidance on home improvement financing provides additional context for evaluating loan types and project costs.

What a GAF-Certified Installer Means for Roof Financing

GAF certification and roof financing answer two different questions. Certification relates to the roofing work: the contractor’s familiarity with approved GAF products and the installation context for those materials. North Wood’s Roofing is GAF-certified for approved Timberline products, including the products discussed in its GAF Timberline HDZ shingles guide. That information can help you ask better questions about material selection, installation, and the scope of the work.

It does not mean GAF has approved your application for roof financing. Certification is not a credit decision, a lender relationship, or a promise that you will receive a particular rate, term, payment, or approval. North Wood’s Roofing offers financing through third-party providers, but those providers, not the roofing certification, determine whether an applicant qualifies and what terms may be available.

Keep the roofing scope and financing offer separate

Start by making sure the roofing proposal clearly explains the work being considered. Ask which materials are included, what preparation or repairs may be needed, and what warranties or installation commitments apply. Then review the financing documents separately. Confirm who the lender is, who receives your application, and which document states the amount financed, APR, fees, repayment schedule, and other terms.

When comparing offers, look at APR rather than an interest rate alone. APR can include the interest rate plus lender fees, so it may provide a broader view of borrowing cost. Borrowing also creates an interest expense that should be included in your project planning. Contractor-connected financing may be convenient, but consumer guidance recommends comparing its rates and terms with other options before deciding.

A certified installer can help explain the roofing side of the decision. The lender must explain the financial side. Keeping those roles distinct makes it easier to choose materials and payment arrangements based on clear information, without treating a roofing credential as a financing guarantee.

What Should You Check Before Accepting a Roof Financing Offer?

Before accepting roof financing, read beyond the advertised payment. The offer should make clear what you will repay, when payments begin. What happens if circumstances change, and whether your home is part of the security for the debt. HUD recommends understanding loan terms and repayment requirements before signing, and accounting for interest, payments, and service charges in the job cost. Read the guidance from HUD.

What is the difference between the interest rate and APR?

The interest rate describes the cost of borrowing the principal. APR is a broader comparison figure because it includes the interest rate plus lender fees. An offer with a lower advertised interest rate is not automatically the less expensive choice if it carries larger upfront charges. Compare the APR, the amount financed, and the total repayment rather than focusing on one line.

Which fees should you look for?

Review every upfront and ongoing charge. Look for origination fees, application or service fees, documentation charges, and any fee tied to a payment method or late payment. The Consumer Financial Protection Bureau specifically recommends examining upfront loan costs, especially origination charges, when comparing Loan Estimates. Its comparison guidance explains that origination charges are upfront fees charged by the lender. See the CFPB comparison guidance.

How do the rate, term, and total repayment fit your budget?

Ask whether the rate is fixed or variable. A fixed rate stays the same under the agreement, while a variable rate can change according to its terms. Confirm the length of the loan, the scheduled payment, and the total amount repaid over the full term. A longer term may change the payment structure, but it can also affect the total borrowing cost. Ask the lender to show these figures in writing.

What happens if you pay late or pay early?

Find the late-payment grace period, penalty fees, reporting practices, and any provision that could change the APR or other terms. Missed payments may lead to penalty fees or higher APRs, according to GAF’s homeowner financing guidance. Also ask whether there is a prepayment penalty, whether extra payments reduce principal, and how the lender applies them.

Is your property securing the roof financing?

Ask directly whether the agreement is secured by your home or other property. If it is, read the default and enforcement language carefully and understand the potential consequences before signing. Do not rely on a verbal explanation. Read and understand the complete documents, including disclosures, repayment requirements, fees, and cancellation language.

How Does the Roof Financing Application Process Work?

A clear application process starts with the roofing project, not the loan form. Understanding the roof’s condition and the work it may need helps you seek financing for a defined scope rather than an uncertain amount. Use this sequence to keep the roofing decision and the financing decision organized.

  1. Inspect the roof and define the scope. Begin with a professional inspection that documents the roof’s condition, including any visible damage and areas that may need repair or replacement. Ask questions about what is urgent, what can wait, and which recommendations are optional. A clear scope gives you a better basis for evaluating any financing amount.
  2. Get a clear, written estimate. Request an itemized estimate that explains the proposed work, materials, labor, warranties, and any exclusions. HUD recommends getting more than one contractor estimate and notes that the cheapest option is not always the best fit. Before moving forward, make sure you understand the project costs, as well as what is and is not included. HUD’s home improvement guidance offers related planning advice.
  3. Compare available financing choices. Once you know the project scope, compare the options available to you. Look at the loan cost, fees, repayment terms, service, and whether the lender can meet your needed project timeframe. If you receive Loan Estimates, CFPB guidance says comparing multiple estimates can help you evaluate offers and may support negotiation. Origination charges are upfront fees charged by the lender, so include them in your comparison.
  4. Submit information only through the lender’s secure process. North Wood’s Roofing can discuss available third-party financing options, but it is not the lender. Use the lender’s official, secure application process and provide only the information requested there. Do not send sensitive financial information through an informal message or to an unverified contact.
  5. Review approval documents before signing. Read the final documents carefully. Confirm the amount, interest or APR, fees, payment schedule, term, and repayment requirements. Ask the lender to explain anything unclear, and do not treat approval as a reason to skip the review.
  6. Coordinate the roofing work. After you understand and accept the financing documents, confirm the work scope, materials, scheduling, and payment process with the roofing contractor. Keep your estimate and financing paperwork together so the project and repayment obligations remain easy to track.

Is Roof Financing Right for Your Situation in Florida?

The right payment approach depends on more than whether a lender says yes. Start with the roof’s urgency, your available cash reserves, credit profile, home equity, and how long you expect to remain in the home. A small repair may call for a different plan than a full replacement, while delaying active leaks can allow damage to grow. A clear inspection and written scope can help you separate immediate needs from improvements that can wait.

Cash is generally the thriftiest way to fund home improvements, according to the U.S. Department of Housing and Urban Development. However, using every reserve may leave you less prepared for another home emergency. If you do not have enough cash, compare available options carefully. Credit and equity can affect what you qualify for, and a loan secured by the property can carry different consequences from an unsecured option. Consider whether the expected repayment fits your budget through the full term, not just during the first few months.

Your timeline and long-term plans matter, too. If you may sell or refinance soon, understand whether the financing must be settled before that transaction. If you plan to stay for years, focus on the total repayment requirements and whether the roof work addresses the problem you actually have. HUD advises homeowners to understand loan terms and repayment requirements before proceeding.

Florida homeowners may also encounter PACE, a specialized property-assessment arrangement. The Consumer Financial Protection Bureau explains that PACE finances qualifying improvements through an assessment on the property. Florida authorized PACE programs for certain energy, renewable-energy, and wind-resistance improvements. Depending on the agreement, the assessment may need to be paid off when you sell or refinance. Florida protections also include a three-day right to cancel, but read the current official terms carefully and confirm that the proposed work and arrangement apply to your situation.

For homeowners in Gainesville, Live Oak, Lake City, and nearby communities, reviewing the scope with a local contractor can clarify whether you need North Florida roofing services or targeted roof repair options. The FAQ below addresses common questions homeowners ask before choosing a path.

Frequently Asked Questions

Is financing a roof a good idea?

It can be, especially when a roof needs attention and paying cash would leave too little emergency savings. Compare the total borrowing cost with your budget, project urgency, and repayment ability. Cash is generally the thriftiest option for home improvements, according to HUD guidance, but the right choice depends on your circumstances.

Is it hard to get approved for roof financing?

Approval depends on the lender’s requirements and your financial profile, so no contractor can promise an outcome. Ask what information is needed, whether the offer is secured or unsecured, and which terms apply before submitting an application. North Wood’s Roofing can discuss project scope, but financing is provided through third parties.

Can you pay monthly for a new roof?

Some financing arrangements use scheduled payments, but the amount, frequency, term, and total cost depend on the lender and product. Review the repayment schedule, interest, fees, and any late-payment consequences in the documents before signing. A roofing estimate and a financing approval are separate decisions.

What should you compare in a roof financing offer?

Compare the annual percentage rate, interest rate, upfront fees, repayment term, total repayment, payment schedule, and prepayment language. APR can include the interest rate plus lender fees, according to GAF’s financing guidance. Also ask whether missed payments can trigger fees or a higher APR.

Are government programs available for roof replacement in Florida?

Some federal or state-related programs may apply only to specific homes, borrowers, or improvement types. For example, the CFPB describes Florida PACE as financing that creates a property tax assessment. And that assessment may need to be paid when a property is sold or refinanced. Read current official program terms carefully before choosing this route.

Get Started With a Clear Roofing Plan

If you are weighing a roof project and want to understand the scope before discussing payment options, a clear inspection can help you make an informed decision. North Wood’s Roofing can review your roof, provide an honest estimate, and explain available third-party financing options without promising approval or specific terms. Contact North Wood’s Roofing to request a free, honest roof inspection or estimate for your North Florida home.

Get an Instant Free Roof Estimate!

Instant Free Estimate

Get your price NOW!