Categories
Blog

How to Tell If Your Roof Has Storm Damage After a Hurricane

Hurricane roof damage is any wind, rain, hail, debris, or fallen-limb damage that changes how your roof sheds water or protects your home. You can spot warning signs from the ground and inside a safe attic, but a ground check cannot rule out hidden damage.

Request a free, photo-documented roof inspection from North Wood’s Roofing for an honest evaluation and clear next-step options.

After a storm, the roof may look mostly normal from the street even when a shingle edge, flashing joint, vent, or roof penetration has been disturbed. Start with safety, observe what you can without climbing, record the condition before cleanup, and get professional help when the signs point to a problem. For the broader repair process, see North Wood’s Roofing’s storm damage roof repair guide.

Safe Ways to Inspect Your Roof After a Storm Without Climbing Up

A safe post-hurricane roof inspection begins at ground level. Wet surfaces, loose materials, hidden structural damage, downed wires, and unstable trees can turn a quick look into a serious hazard. Your goal is not to diagnose the roof from a ladder. Your goal is to decide whether the roof needs a professional inspection and to preserve useful evidence.

Start with the property, not the roof

  • Wait until high winds, lightning, flooding, and nearby hazards have passed.
  • Stay away from downed power lines, damaged utility equipment, unstable trees, and standing water near electrical systems.
  • Do not walk beneath a visibly sagging roof edge, leaning tree, or loose section of siding.
  • Keep children and pets away from roofing pieces, broken glass, nails, and storm debris.

Use a ground-level view

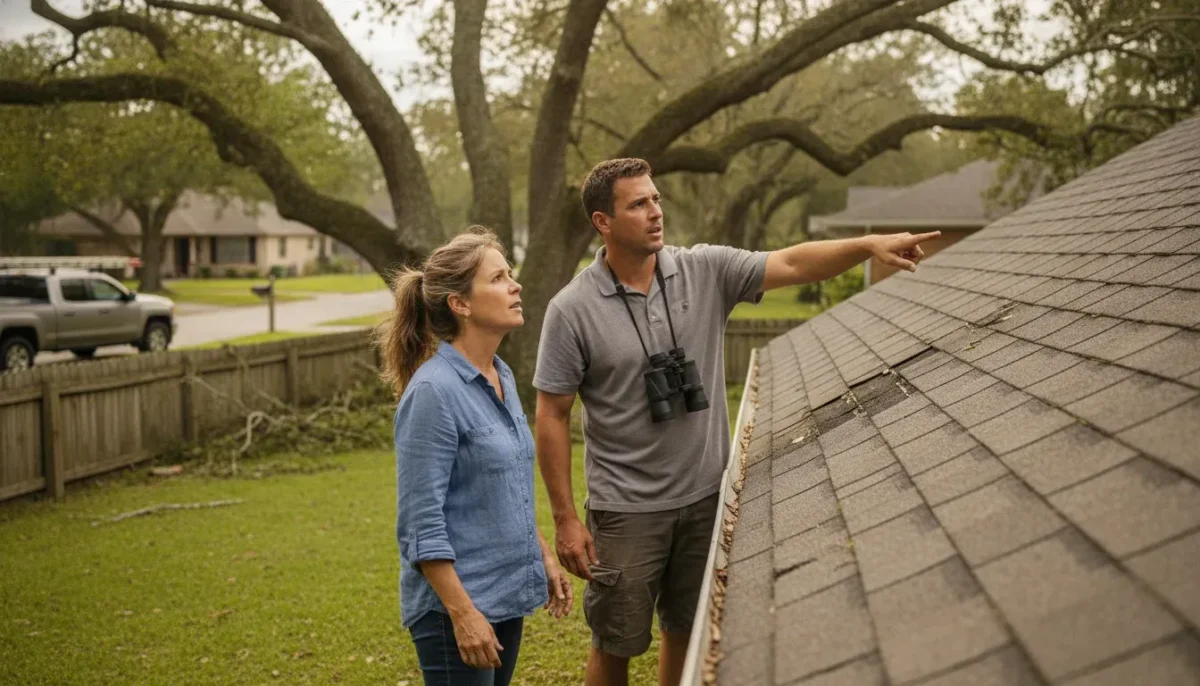
Walk the perimeter only when the yard is safe. Use binoculars or your phone camera zoom instead of a ladder. Look at the roofline from several angles and compare it with older photos if you have them. Note changes around valleys, eaves, vents, skylights, chimneys, wall intersections, gutters, and downspouts.

Check the interior only when it is safe

If there are no electrical or structural hazards, look for new water stains, damp insulation, musty odors, dripping, or daylight in the attic. Do not enter an attic with a sagging ceiling, active electrical concern, standing water, or signs that the structure is unstable. Never climb onto a wet or damaged roof to confirm what you see from below.

Signs of Storm Damage You Can See from the Ground

Visible hurricane roof damage often appears as a change in the roof’s pattern, edge, or surrounding drainage system. A single sign may justify an inspection, especially when it appeared after the storm. The table below is a screening guide, not a repair diagnosis.

What you may notice What it may indicate Next step
Missing, lifted, curled, cracked, or creased shingles Wind movement, impact, or a disturbed seal Photograph the area from the ground and schedule an inspection
Shingle pieces, metal, or fasteners in the yard Roof covering or flashing may have separated Keep people away from debris and save it if safe
Uneven roofline or loose edge Damage to roof covering, edge metal, decking, or supporting materials Do not approach the area; request professional assessment
Bent vents, flashing, gutters, fascia, or downspouts Impact or wind damage around the roof system Photograph the whole elevation and the close detail
New granules gathered in gutters or at downspouts Possible surface loss from shingle impact or abrasion Record where the material collected and ask for an inspection
Branches resting on the roof or puncture marks Impact damage that may allow water into the roof assembly Stay clear and arrange safe debris removal and roof review

Do not assume a roof is undamaged because no shingles are visible on the ground. Wind can disturb a fastening point or flashing transition without removing a large piece. A small opening can also stay dry until the next rain arrives from the right direction.

Look for changes around roof penetrations

Roof vents, pipe boots, skylights, chimneys, and wall intersections are places where separate materials meet. From the ground, look for a tilted vent, missing cap, displaced flashing, lifted sealant, or a gap that was not present before the hurricane. Do not touch loose components or place a ladder against the roof to get closer.

Inspect the drainage path

Gutters and downspouts are not the roof covering, but storm damage can affect the complete water-shedding path. Look for a detached gutter, bent downspout, damaged fascia, unusual sagging, or roof material blocking an outlet. Keep performance claims qualified: a clean, connected drainage system helps direct water away from the roof edge, but it cannot correct damage higher on the roof.

What Hidden Storm Damage Looks Like Inside Your Attic

Hidden hurricane roof damage may show up indoors before it is visible outside. Water stains, damp insulation, musty odors, drips, or daylight through the roof deck can point to a breach or failed transition. Interior signs can also have other causes, so use them to trigger a professional assessment rather than attempting a roof repair yourself.

Signs to record

  • New brown or discolored ceiling and wall marks after the storm.
  • Wet insulation, damp roof decking, or a musty smell in the attic.
  • Drips or fresh moisture around vents, skylights, chimneys, or exterior walls.
  • Daylight visible through a location that should be covered.
  • Ceiling material that is sagging, bulging, or separating.
  • Water that appears far from the visible exterior roof sign.

Water can travel along framing or insulation before it becomes visible. That is why the location of an indoor stain may not identify the source. Do not cut into a ceiling, move unstable materials, or enter a risky area to trace a leak. If water is near an electrical fixture, keep clear and contact the appropriate emergency professional.

Have a new leak or visible roof concern? North Wood’s Roofing can help evaluate the condition and explain repair options without pressure.

Which Roof Damage Requires Professional Assessment?

Professional assessment is the right next step when storm damage affects the roof covering, edge, flashing, drainage, attic, or interior ceiling, or when you cannot inspect safely. A roofer can review areas that are not visible from the ground and document findings with clear photos. If you are unsure, treat the question as a reason to schedule an inspection rather than a reason to climb.

Call for an inspection when you see

  • Missing, lifted, creased, cracked, or visibly displaced roofing materials.
  • New leaks, damp insulation, water stains, or daylight in the attic.
  • A sagging ceiling, uneven roofline, or suspected roof-deck damage.
  • Damage around a skylight, chimney, vent, pipe boot, or wall intersection.
  • Branches, metal, or other debris that struck or remains on the roof.
  • Loose gutters, fascia, soffit, or edge materials after the storm.
  • Any condition you cannot reach or evaluate without a ladder or roof access.

For urgent life-safety hazards, use emergency services first. For a roof concern that is not an immediate emergency, choose a licensed and insured contractor who will explain what the photos show, separate temporary protection from permanent work, and provide clear next-step options. North Wood’s Roofing serves homeowners in Gainesville, Live Oak, Lake City, and nearby North Florida communities.

How to Document Damage for an Insurance Claim

Good documentation creates a clear record of what changed and when. It does not decide whether a claim is covered. Coverage, deductibles, exclusions, notice requirements, and claim decisions depend on your policy and insurer, so review your policy and contact the carrier for claim instructions.

Record the condition before cleanup

  1. Take wide photos showing each affected side of the home and the surrounding yard.
  2. Take closer photos of missing materials, lifted edges, debris, stains, gutters, and interior damage.
  3. Capture short videos when they show movement, dripping, or the location of a problem better than a still image.
  4. Write down the date of the storm, when you noticed the change, and which rooms or roof areas are affected.
  5. Keep a simple list of damaged or missing property, and save receipts for reasonable emergency steps.
  6. Keep copies of inspection reports, estimates, invoices, correspondence, and photos in one folder.

Do not make a permanent repair solely to improve a claim or remove evidence that an inspector needs to see. Take reasonable steps to reduce additional damage only when they are safe and permitted by your insurer. Moving belongings away from a leak may be reasonable; climbing onto the roof to apply a tarp is not a safe do-it-yourself shortcut.

Use older photos as a comparison

Photos taken before the storm can help show whether a shingle, vent, gutter, or roof edge changed. Use them as context, not as proof of a coverage decision. A qualified roofing professional can compare the visible condition with the roof system and provide photo documentation for your records.

What to Do in the First 24 Hours After a Major Storm

The first day is about safety, observation, documentation, and preventing avoidable additional damage. Move through these steps in order:

  1. Confirm that people are safe. Leave areas with downed wires, unstable trees, a sagging ceiling, flooding, or other immediate hazards.
  2. Wait for safe conditions. Do not inspect during lightning, high winds, or active flooding.
  3. Observe from the ground. Use zoom or binoculars and avoid ladders, roof access, and loose debris.
  4. Check safe interior areas. Look for new moisture or stains without entering unstable spaces.
  5. Document before cleanup. Photograph the roofline, yard, gutters, attic signs, ceilings, and damaged belongings.
  6. Contact your insurer if you plan to file. Ask what notice, documentation, and temporary protection steps your policy requires.
  7. Arrange a professional roof inspection. Ask for clear photos, a written explanation, and options that distinguish urgent protection from permanent repair.

For future preparedness, NOAA recommends keeping a home in good repair and strengthening vulnerable areas before a hurricane. Read the NOAA hurricane home-preparedness guidance for planning information. Preparation does not replace a post-storm inspection when the roof shows new warning signs.

Contact North Wood’s Roofing for a free roof inspection with clear photos and honest next-step options after a hurricane.

Frequently Asked Questions About Hurricane Roof Damage

How can I tell if my roof has storm damage after a hurricane?

Look from the ground for missing or lifted shingles, exposed areas, bent flashing or vents, damaged gutters, debris impact, an uneven roofline, or new granules in drainage areas. Then check safe interior spaces for new stains, damp insulation, drips, musty odors, or daylight. These signs justify a professional inspection, even if the roof looks mostly intact.

Should I climb on my roof to look for hurricane damage?

No. A wet, damaged, or debris-covered roof can be unsafe, and climbing can worsen damage. Use a ground-level view, binoculars, or camera zoom. Have a qualified professional inspect roof surfaces, flashing, penetrations, and areas that cannot be evaluated safely from the ground.

Can a roof leak after a hurricane even if I do not see missing shingles?

Yes. Water can enter through disturbed seals, flashing, vents, fasteners, or small openings that are hard to see from the street. Check safe attic and living-space areas for new moisture, but do not cut into ceilings or enter an unstable area to trace a leak.

What should I photograph after hurricane roof damage?

Photograph wide views of each side of the home, close views of visible roof and gutter changes, debris, interior stains, attic moisture, and damaged belongings. Record when you noticed the problem, and save inspection reports, estimates, receipts, and insurer communications.

Does a professional inspection guarantee that insurance will pay for repairs?

No. A roofing inspection can document observed conditions and explain repair needs, but coverage depends on your policy, the cause of loss, exclusions, deductibles, notice requirements, and your insurer’s claim decision. Ask your insurer for claim instructions and keep your roofing documentation with your records.

Get a Clear Next Step After the Storm

A ground-level check can help you recognize hurricane roof damage, but it cannot confirm that a roof is safe or watertight. If you see new warning signs, document them without taking risks and arrange a professional evaluation. North Wood’s Roofing provides free, photo-documented inspections for homeowners who want an honest assessment and no-pressure options. Visit the North Wood’s Roofing team page to learn more about the local, owner-led approach, or request an inspection.
Categories
Blog

7 Signs Your Florida Roof May Have a Leak

A roof leak in Florida does not always begin with a dramatic drip. The signs of roof leak Florida homeowners notice first may be a faint ceiling mark, damp insulation, loose shingle, or water that appears only after a storm. These clues do not prove the roof is leaking, but they are worth taking seriously. This checklist explains what you can observe without climbing onto the roof, which symptoms may have another cause, and when a photo-based inspection can help identify practical next steps.

Request an honest roof assessment from North Wood’s Roofing if you are unsure what a new stain, drip, or exterior roof change means.

What are the most common signs of a roof leak in Florida?

Common warning signs include ceiling or wall stains, active drips, peeling paint, musty odors, damp attic materials, daylight through the roof deck, missing or lifted shingles, damaged flashing, and unusual water after heavy rain. A single symptom can have another explanation, so the pattern, timing, and location all matter.

  1. Brown or yellow ceiling and wall stains. A new discolored patch, bubbling paint, or a ring-shaped mark may mean water has reached drywall or plaster. Photograph the area and note whether it grows after rain.
  2. Drips, dampness, or a musty smell. Water may show up as an active drip, wet insulation, or a persistent musty odor. Condensation and plumbing problems can cause similar symptoms, so do not assume the roof is the source from smell alone.
  3. Peeling paint or soft interior materials. Paint that blisters, wood trim that swells, or drywall that feels soft can point to repeated moisture. Do not press a sagging ceiling or disturb material that looks unstable.
  4. Moisture or daylight in the attic. From a stable, accessible location, look for damp insulation, dark staining on the underside of the roof deck, rust around fasteners, or visible daylight. Use a flashlight, and do not crawl across insulation or step where the framing is not clearly supported.
  5. Missing, lifted, cracked, or visibly worn shingles. From the ground, look for a shingle that is out of alignment, a bare-looking patch, or roofing debris in the yard after wind. A ground-level view cannot confirm the condition of the underlayment or decking.
  6. Damaged flashing, pipe boots, or roof-edge details. From a safe position, you may notice lifted metal, cracked sealant, or an opening around a vent or skylight. These details are difficult to evaluate from the yard, and they should not be handled by a homeowner on a roof.
  7. Water that appears after a storm or heavy rain. A ceiling mark that returns after wind-driven rain, or water near an exterior wall or roof edge, deserves attention even if the roof looks mostly intact. Water can travel before it becomes visible inside.

Why can a small roof leak become a bigger problem?

A small roof leak can allow repeated moisture into roofing materials, insulation, framing, or interior finishes before the source becomes obvious. The visible ceiling mark may be several feet from the entry point because water can follow the underside of the roof deck or other building materials. Early observation helps you document the symptom before more damage obscures the source.

Florida homes face repeated sun, humidity, heavy rain, and wind exposure. Those conditions can affect roof coverings as well as details such as flashing, pipe boots, valleys, and roof edges. A roof may look acceptable from the driveway while a seal or connection needs a closer inspection. That is why a symptom-led checklist is useful for deciding what to document, but not for diagnosing the repair by itself.

If the same stain returns, expands, or appears in more than one place, treat it as a reason to arrange an evaluation rather than simply repainting the ceiling. North Wood’s Roofing describes its repair service as focused on finding the underlying cause, with inspections of roof components including soffit and fascia when needed.

See North Wood’s Roofing roof repair options when a leak symptom is recurring, active, or difficult to trace.

What can a homeowner safely check?

Homeowners can document interior symptoms and observe the roof from the ground, but a safe check has clear limits. Look up from the yard, inspect accessible rooms, and photograph what you see in good light. Do not climb onto a wet roof, walk on shingles, open a damaged ceiling, or enter an attic that is hot, unstable, contaminated, or difficult to access.

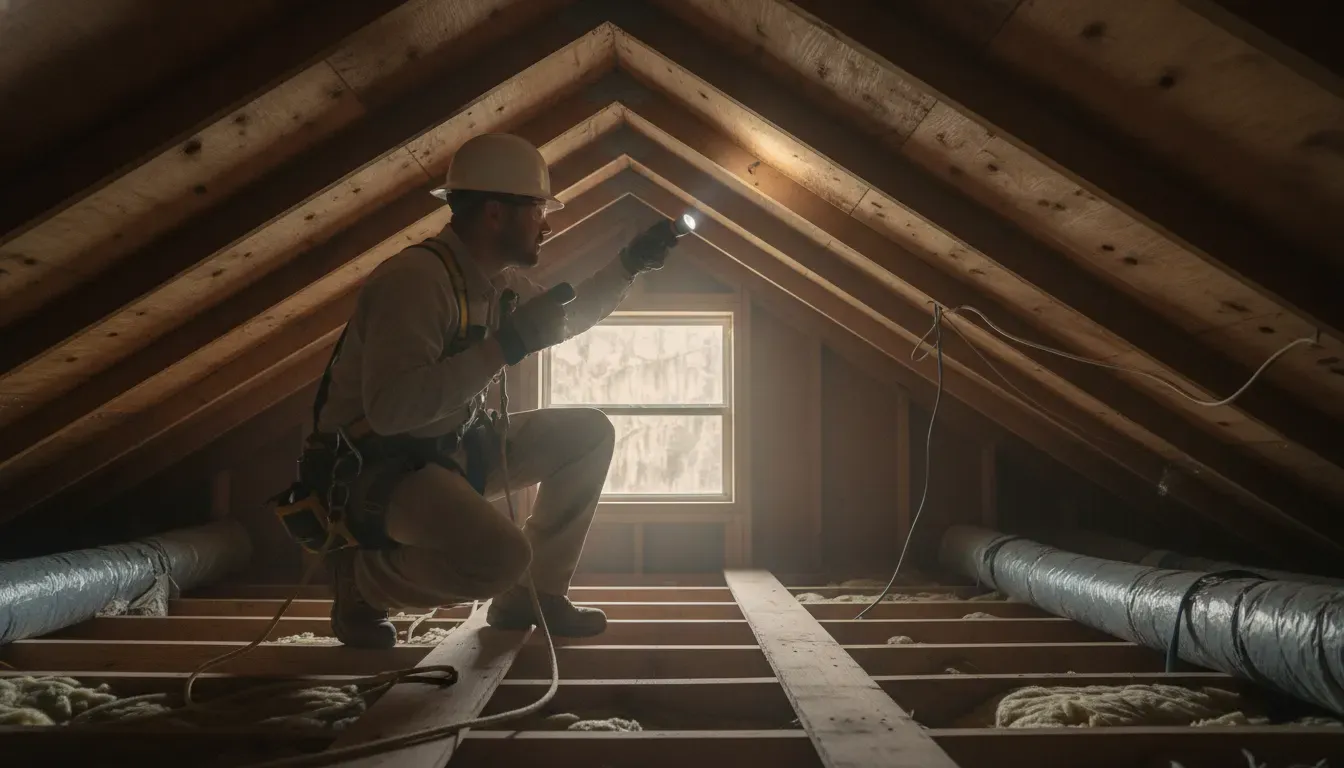
Roofing professional checking attic framing for possible Florida roof leak signs

Safe observation What it may suggest What it cannot confirm
Ceiling stain or peeling paint Moisture reached an interior finish The exact roof entry point
Dark attic mark or damp insulation Recent or repeated moisture Whether the roof or another source caused it
Loose shingle visible from the yard Possible wind or wear damage Underlayment or deck condition
Water near a gutter or roof edge Possible drainage or flashing concern Whether the gutter, roof, or wall is responsible

Take wide photos that show the room, closer photos of the mark, and a few exterior photos from the ground. Include the date in your notes and record whether the symptom appeared after a storm, steady rain, or no recent rain. Avoid moving wet electrical equipment or touching fixtures near water.

When should you stop investigating and call a roofer?

Stop investigating when the next step would require a roof climb, walking on a wet or damaged surface, entering an unsafe attic, touching electrical equipment near water, or disturbing a sagging ceiling. Call for professional help when water is actively entering, the stain is growing, a storm has caused visible damage, or you cannot tell whether the issue is roofing, drainage, plumbing, or condensation.

  • Keep people away from a sagging ceiling or visibly unstable area.
  • Move furniture and belongings away from a drip when it is safe to do so.
  • Use a container to catch water if the area is stable and there is no electrical hazard.
  • Photograph the damage before cleanup changes what can be seen.
  • Do not seal, patch, or paint over the symptom before its source is understood.
  • Do not get on the roof to look for a missing shingle after rain or a storm.

These steps are for observation and damage control, not a substitute for a roof assessment. A professional can compare the interior symptom with the roof surface and related components instead of assuming the nearest visible defect is the source.

Contact North Wood’s Roofing for a photo-based, no-pressure next step if the area is safe to document but the cause is unclear.

How does a photo-based roof inspection help?

A clear photo-based inspection gives a roofer useful context before discussing repair or replacement options. Interior photos show where the symptom appeared, while ground-level exterior photos can show the roof slope, edge, debris, or storm-related changes. Photos do not replace an on-site inspection, but they can help organize the conversation around what is visible and what still needs to be checked.

North Wood’s Roofing emphasizes free honest inspections with clear photos and no-pressure options. That approach is helpful when the visible symptom does not identify the actual entry point. The goal is to understand whether the issue appears localized, related to drainage or a roof detail, or broad enough to warrant a more complete evaluation. Do not treat a photo as proof that a roof needs replacement, and do not assume a roof is sound simply because no stain is visible yet.

What if I notice only one warning sign?

One warning sign may be enough to document and monitor, especially if it is new or follows a storm. It is not enough to diagnose a roof leak on its own. Compare the timing with rain, plumbing use, indoor humidity, and gutter overflow, then arrange an evaluation if the symptom returns, spreads, or cannot be explained safely.

For a younger roof, a preventive check may also make sense when you are already seeing roof-edge wear, debris buildup, or loose details from the ground. North Wood’s Roofing offers a roof tune-up service that its site describes as including pipe boot and flashing resealing, gutter blowout, a roof health inspection, and a photo report. Confirm the current service details with the company before scheduling.

How can you tell a roof issue from a plumbing or condensation issue?

A ceiling mark is evidence of moisture, not proof of a roof leak. Compare when it appears with rainfall, plumbing use, air-conditioning operation, and gutter overflow, while keeping your observations simple and safe. A roof-related symptom may return after wind-driven rain, while plumbing or condensation can follow a different pattern. Only a qualified inspection can confirm the source when clues overlap.

Write down the room, approximate size, color, odor, and timing of the mark. Photograph the same area again after the next significant rain rather than opening walls or removing insulation. This record helps a roofer distinguish a recurring pattern from a one-time event and keeps the conversation focused on what can actually be verified.

A practical next step for North Florida homeowners

The safest response to possible roof leak signs is simple: contain any active water when you can do so safely, document the interior and ground-level exterior clues, stay off the roof, and ask for an evaluation when the symptom is recurring or unclear. North Wood’s Roofing serves homeowners in Gainesville, Live Oak, Lake City, and nearby North Florida communities with a local, owner-led approach.

Schedule a free, honest roof inspection with North Wood’s Roofing to discuss what your photos and observations may mean.

A visible stain is a reason to pay attention, not a reason to panic or guess at a repair. The right next step depends on the roof’s condition, the source of the moisture, and what can be verified safely.

Categories
blogs

Roof Replacement: A Comprehensive Guide for Homeowners

We understand that needing a new roof can feel overwhelming. At North Wood's Roofing, we're here to simplify the process and help you make the best decisions for your home. This guide will walk you through every step, from recognizing the signs you need a new roof to choosing the right materials and contractor.

Let's get started!

Signs It's Time for a New Roof

Knowing when your roof needs replacing can save you a lot of trouble and money in the long run. Here are some key things to watch out for:

Pro Tip: Regular roof inspections by a professional roofing contractor can help identify potential problems early on, preventing costly repairs down the road. At North Wood's Roofing, we offer comprehensive roof inspections to give you peace of mind.

Choosing the Right Roofing Materials

Once you've decided to replace your roof, the next step is choosing the right materials. Here's a breakdown of some popular options:

Consider these factors when choosing your roofing material:

Finding a Reliable Replacement Roofing Company

Selecting a qualified and trustworthy roofing contractor is crucial for a successful roof replacement. Here's what to look for:

Understanding the Roof Replacement Process

The roof replacement process typically involves the following steps:

Costs and Financing Your New Roof

Roof replacement is a significant investment, and it's important to understand the costs involved. Here are some factors that influence the overall cost:

Financing Options:

Maintaining Your New Roof

Proper maintenance is essential to extend the life of your new roof and protect your investment. Here are some tips:

Signs of Potential Problems:

Maximizing Your Roof's Lifespan: Tips and Tricks

Congratulations on your new roof! Now, let's talk about how to keep it in top shape for years to come. Remember, a well-maintained roof not only protects your home but also adds value to your property.

The Importance of Regular Inspections

Just like you schedule regular checkups for your car or yourself, your roof needs routine inspections too. Aim for at least one professional inspection per year, especially after harsh weather events like storms or heavy snowfall.

What to Look For During an Inspection:
Simple DIY Roof Maintenance

While professional inspections are essential, there are also some simple maintenance tasks you can do yourself:

Dealing with Common Roof Problems

Even with the best care, roof problems can sometimes arise. Here are some common issues and how to address them:

Understanding Your Roof Warranty

Your new roof likely comes with a manufacturer's warranty on the materials and a workmanship warranty from your contractor. It's important to understand the terms of these warranties to protect your investment.

Key Things to Know About Your Warranty:

Pro Tip: Keep a copy of your warranty in a safe place and review it periodically to understand your coverage.

Enhancing Your Roof's Performance

Beyond basic maintenance, there are several ways to enhance your roof's performance and longevity:

Proper Ventilation

Adequate attic ventilation is crucial for regulating temperature and moisture levels in your attic. This helps prevent ice dams in the winter and reduces the risk of heat damage to your shingles in the summer.

Types of Attic Ventilation:
Reflective Roofing Materials

If you live in a hot climate, consider using reflective roofing materials to reduce heat absorption and keep your home cooler. This can also help lower your energy bills.

Examples of Reflective Roofing Materials:
Regular Gutter Cleaning

Clean gutters are essential for directing water away from your home's foundation and preventing damage to your roof and landscaping. Clogged gutters can cause water to back up and overflow, leading to leaks and other issues.

Tips for Gutter Cleaning:

Protecting Your Roof from the Elements

Your roof is constantly exposed to the elements, so it's important to take steps to protect it from damage.

Wind Damage

High winds can tear off shingles and cause significant damage to your roof. To minimize wind damage:

Hail Damage

Hail can dent and crack shingles, leading to leaks and other problems. To protect your roof from hail:

Investing in Your Home's Future

We hope this guide has provided you with valuable insights into the roof replacement process. At North Wood's Roofing, we're committed to delivering high-quality roof repairs and replacements using the best materials and workmanship. If you have any questions or need assistance with your roofing project, don't hesitate to contact us.

We're here to help you every step of the way!

Categories
blogs

Identifying and Addressing Common Roofing Scams: A Homeowner’s Guide

As a homeowner, your roof is one of the most critical components of your home. It protects your family, your belongings, and the structure of your house. When it’s time for maintenance or repairs, you want to make sure you’re hiring someone trustworthy. Unfortunately, roofing scams are more common than most people realize, and falling victim to one can leave you with shoddy work, financial loss, and even more damage.

At North Wood's Roofing, we’ve seen too many cases of homeowners being taken advantage of by unscrupulous contractors. That’s why we’ve put together this guide to help you recognize and avoid common roofing scams. Armed with this knowledge, you can ensure your roof repairs are done right and by the right people.

The Most Common Roofing Scams and How to Spot Them

1. The Door-to-Door Roofing Salesman

You’ve probably experienced this scenario: Someone knocks on your door, claims to have noticed damage to your roof, and offers a free inspection. While this might sound convenient, many of these so-called “inspectors” are looking for easy targets.

Red Flags:

Tip: Always ask for proof of licensing and insurance. A legitimate roofing company will gladly provide these details. Avoid making decisions on the spot, especially if they initiate contact.

2. The Storm Chaser Scam

After a major storm, it’s common for roofing contractors to canvass neighborhoods offering to fix damage quickly. Some of these businesses, known as “storm chasers,” are legitimate, but many are not. They often perform low-quality repairs and disappear as fast as they appeared, leaving you with a roof that won’t hold up.

Red Flags:

Tip: Work with a local roofing company like North Wood's Roofing, where you can visit our office, check reviews, and trust that we’ll be around for years to come.

3. The Insurance Fraud Scheme

This scam often involves contractors offering to waive your insurance deductible or inflate the claim to cover other repairs. While it might seem like a way to save money, it’s illegal and can result in your insurance policy being canceled.

Red Flags:

Tip: Always insist on a written contract and ensure all work aligns with your insurance policy’s terms. If something feels off, consult your insurance provider directly.

Protecting Yourself from Roofing Scams

Research is Your Best Defense

Before hiring a roofing company, take the time to do your homework. Here’s how to vet a contractor effectively:

Get Multiple Quotes

Avoid contractors who pressure you into signing a contract without comparing estimates. Getting at least three quotes ensures you’re not overpaying or settling for subpar work.

Know the Signs of Quality Work

When inspecting your roof repairs, look for:

If anything seems rushed or incomplete, address it immediately with your contractor.

What to Do If You’ve Been Scammed

If you suspect you’ve been targeted by a roofing scam, act quickly to minimize the damage:

How North Wood's Roofing Helped a Homeowner Recover

One of our recent clients, Jane, fell victim to a storm chaser scam. After noticing leaks in her roof, she called us for an inspection. Our team identified substandard repairs and materials, causing more harm than good. We worked with Jane’s insurance provider to ensure her roof was repaired correctly, giving her peace of mind and a durable solution.

FAQs About Roofing Scams

Get an Instant Free Roof Estimate!

Instant Free Estimate

Get your price NOW!