
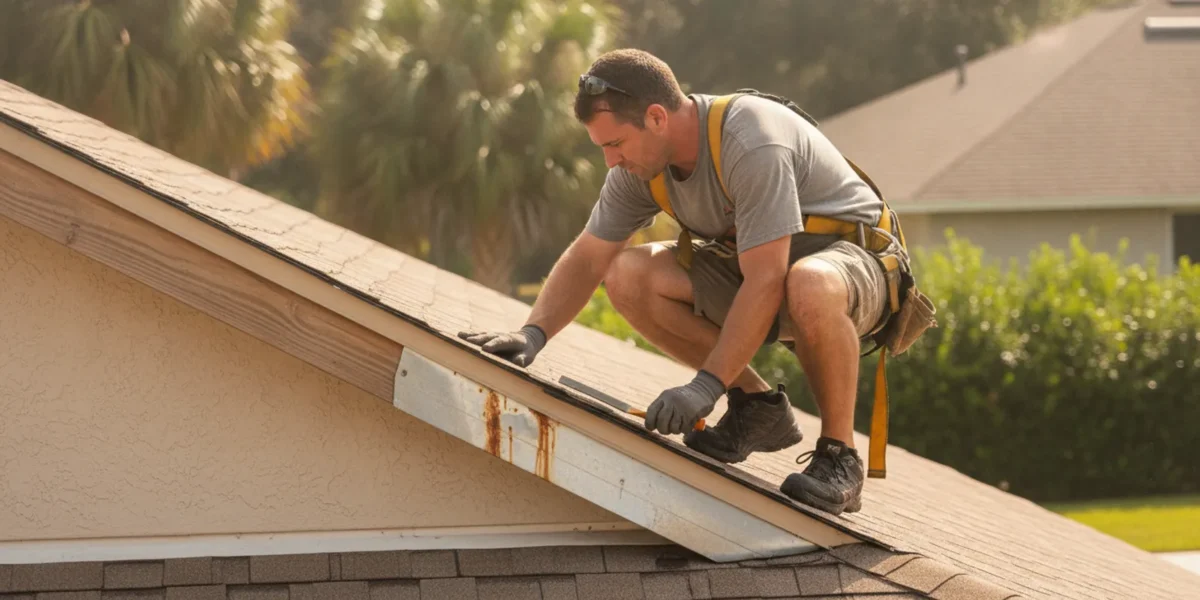
What is roof flashing? It is the formed metal or other compatible material used at roof joints and interruptions to guide water away from vulnerable seams. Flashing helps keep rain from getting beneath the roofing where two surfaces meet, or where something passes through the roof. Understanding its job can help North Florida homeowners recognize possible trouble without climbing onto a roof or assuming every stain means the same repair is needed.
Request a free roof inspection
What does roof flashing do?
A roof is not one uninterrupted surface. It has edges, corners, slopes, walls, vents, chimneys, skylights, and other openings or transitions. Shingles or panels cover broad areas, but those materials alone cannot reliably seal every joint. Flashing is fitted at many of these connections to direct water down and away from the opening, rather than letting it collect at a seam.
Think of flashing as part of a water-shedding system, not as a bead of sealant applied over a gap. Good performance depends on how the flashing is shaped, overlapped, fastened, and integrated with the roofing and nearby building materials. The roof covering above it should shed water onto or past it; the pieces should work together so water can continue toward the eaves and drainage path. Sealant may be used at some details, but it is not a substitute for correctly installed flashing.
Flashing is often made from metal, including galvanized steel or aluminum, though the right material and detail depend on the roof and the point being protected. Compatibility matters: different metals and roofing materials can react differently, and details that suit one roof assembly may not suit another. A roofer needs to assess the actual materials and construction instead of recommending one universal flashing solution.
Where is flashing installed on a roof?
Flashing may be visible at some transitions, but it is not always easy to see from the ground. Common locations include:
- Roof-to-wall intersections: Where a sloped roof meets a vertical wall, step flashing is commonly woven in with the roofing course by course. Counterflashing or another appropriate detail may protect the top edge, depending on the wall construction.
- Chimneys: A chimney interrupts the roof surface on several sides. The base and corners need coordinated flashing details, and the upper side may need a cricket or saddle to divert water around a wide chimney.
- Vents and pipes: A roof opening needs a compatible flashing component, often a formed base or boot, fitted around the penetration and integrated with the shingles or panels.
- Skylights: A skylight has a frame and a roof opening. Its flashing system connects the unit to the surrounding roof so runoff is directed around it.
- Valleys and roof edges: Some roof designs use metal at valleys or edges to help guide runoff. The exact detail varies with the roof system and installation plan.
- Other roof penetrations: Exhaust vents and similar openings also require details suited to their shape, location, and roofing material.
The flashing type is not the only thing that matters. For example, a wall intersection needs the flashing to work with both the roof covering and the siding or masonry above it. A skylight detail depends on the unit and roof assembly. North Wood’s offers skylight installation and repair; homeowners considering a skylight should ask how the roof-to-unit transition will be handled as part of the work.
How can roof flashing fail?
Flashing can stop working for different reasons, and a visible symptom does not identify the cause on its own. The problem may be limited to one piece, or water may be entering somewhere nearby and appearing in a different place indoors. Common failure patterns include:
- Loose, lifted, or displaced metal: Fasteners may loosen, a piece may be bent, or movement at a joint may open a path for wind-driven rain.
- Corrosion or deterioration: Exposure to moisture and weather can damage some materials over time. The condition depends on the metal, coating, surrounding materials, and maintenance history.
- Cracked or failed sealant: Sealant can age or separate. Applying more over the surface may hide a symptom without correcting an underlying installation or water-management problem.
- Incorrect overlaps or poor integration: If pieces are not layered to shed water, or are not properly integrated with the roof covering and wall materials, water may get behind them.
- Damage during other work: Roof work, solar or satellite equipment installation, painting, or other activity can disturb nearby flashing. A later leak may appear some distance from the actual opening.
- Wear around a penetration: A boot or formed flashing component around a pipe may split, pull away, or deteriorate. The pipe itself may also move or the surrounding roofing may be damaged.
- Water diverted toward a vulnerable seam: Debris, an obstruction, or an unsuitable detail can affect runoff and keep water near a joint longer than intended.
- Installation detail that does not suit the roof: An incorrect material, shape, fastening method, or connection with adjacent surfaces can leave a weak point from the start.
North Florida’s heat, humidity, heavy rain, and storms can expose weaknesses in roof details. Wind-driven rain may reach places ordinary runoff does not, while repeated wetting and drying can put stress on materials and joints. This does not mean every roof in the region will develop a flashing leak, or that weather alone proves the cause. An inspection should consider the roof’s age and type, recent weather, the location of symptoms, and the condition of connected materials.
What signs might point to a flashing problem?
Clues inside a home can include a new or recurring ceiling stain, dampness near a chimney or skylight, peeling paint, or water marks around an upper wall. In an attic, staining or damp material near a penetration may be worth noting if the space is safely accessible. These signs can also have other causes, such as condensation, plumbing, or a roof issue away from the nearest visible stain. Water can travel along framing or roof components before it becomes visible indoors.
From the ground, a homeowner might notice a piece of metal that appears displaced, a roof-to-wall area that looks irregular, or debris collecting in a roof valley. A ground-level view is limited, however. Flashing can be covered by shingles or siding, and damage is not always visible from below. Do not climb onto a wet, steep, or unfamiliar roof to confirm a suspicion.
If water is actively entering, protect people and belongings first. Move items away from the leak, use a container if it is safe to do so, and avoid touching wet electrical fixtures. Take photographs of the interior damage and note when it appeared and whether it followed rain or wind. If a ceiling is bulging or there is a risk of falling material, keep people clear and contact an appropriate professional. For additional guidance about leak symptoms, see this guide to signs of a roof leak in Florida.
How do roof flashing repairs differ from replacement?
The correct scope depends on what the inspection finds. A localized repair may be appropriate when the problem is confined to a particular flashing detail and the connected roofing remains sound. That could involve correcting a displaced section, replacing a damaged component, or addressing the way a transition is integrated. The specific method should suit the roof material and construction.
Replacement of a larger area may make more sense if several pieces are deteriorated, the underlying roof materials are damaged, or the detail cannot be repaired reliably in place. When a roof covering is being replaced, the roofer can evaluate which flashing can be reused and which should be replaced or modified. A decision should account for the condition of the full connection, not only the part easiest to see.
Here is a practical comparison. These are general possibilities, not a diagnosis or a promise that a particular option will fit every roof:
| Situation found during evaluation | Possible next step | What to clarify |
|---|---|---|
| One accessible piece is loose or locally damaged, and nearby materials appear serviceable | Consider a focused repair of the affected detail | What caused it to move or fail, and how will the connection be restored? |
| Flashing is worn in multiple places or the adjoining roofing is also deteriorated | Compare a broader repair with replacement of the affected roof section | Which materials are included, and how will water be directed at each transition? |
| A roof replacement is planned | Review existing flashing as part of the roof scope | Which pieces will be reused, replaced, or adapted, and why? |
| A leak source is uncertain or the indoor mark may have another cause | Request an inspection before selecting a repair | What evidence points to the proposed source, and are other causes possible? |
Ask for a clear explanation of what was inspected, what evidence supports the recommendation, and whether the work addresses the source or only a visible symptom. Photos can help you understand a detail that is hard to view from the ground. North Wood’s Roofing provides free inspections with clear photos and no-pressure options, according to its service information. You can also review the company’s roof repair service and its broader roofing services before asking questions about your situation.
What can homeowners safely do before an inspection?
A homeowner can gather useful information without stepping onto the roof. Start with the indoor symptoms:
- Record where the stain or dampness is located, when it first appeared, and whether it changes after rain.
- Photograph the affected area and any visible changes over time. Keep a simple note of storms, prior repairs, or other work near the roof.
- If it is safe, look from the ground at the roof area above the symptom. Use a camera zoom or binoculars rather than a ladder, and do not walk beneath unstable branches or damaged roof edges.
- Tell the inspector about nearby features such as a chimney, wall junction, vent, or skylight, but avoid concluding that the closest feature is necessarily the source.
- Ask what the inspection can and cannot establish, what repair choices are available, and whether the recommended work includes related roofing materials.
Do not pry up shingles, pull at metal, or spread sealant on an elevated roof. Those actions can create a fall hazard, damage materials, or make it harder to identify the original problem. If temporary protection is needed, have a qualified professional advise on a safe approach. After storm damage, document what you can see from a safe location and arrange an evaluation rather than trying to inspect a roof yourself.
When comparing contractors in Florida, homeowners can consult the state’s Department of Business and Professional Regulation for licensing information. Ask a roofer to explain the findings, the work included, and any applicable workmanship or material warranty in writing. North Wood’s Roofing is a Florida licensed and insured residential roofing contractor; the company describes its approach as honest pricing, quality workmanship, and no-pressure options. Its about page provides additional company information.
What should you ask a roofer about flashing?
A useful conversation should help you understand the cause and the proposed scope. Consider asking:
- Where do you believe water is entering, and what evidence supports that conclusion?
- Is the flashing itself damaged, or is the issue in the connection between flashing and another roofing or wall material?
- Will you repair one area or replace multiple components? Why is that scope appropriate for the roof’s condition?
- Could water be entering at another point or traveling before it appears indoors?
- Will the written estimate identify the materials and affected areas?
- What should I expect if the leak returns, and what warranty terms apply to this specific work?
Answers should be specific to the roof being evaluated. Be cautious of a recommendation that identifies a cause without inspecting the relevant area, or that relies only on adding sealant without explaining why the detail failed. The right next step may be a focused repair, a more extensive project, or further evaluation if the source is uncertain.
Frequently asked questions about roof flashing
Can a roof leak if the flashing looks intact?
Yes. Some flashing is hidden, and an intact-looking exterior surface does not confirm that overlaps and connections beneath it are working. A leak may also originate elsewhere, so an indoor stain alone cannot identify flashing as the cause.
Does every roof use the same kind of flashing?
No. Details vary by roofing material, roof design, the feature being protected, and how nearby walls or openings are built. A flashing component should be compatible with the roof assembly and installed to shed water at that particular transition.
Is sealant enough to fix flashing?
Not necessarily. Sealant can be part of a suitable detail, but it cannot correct every problem with placement, overlap, fastening, damaged materials, or water flow. An evaluation should identify the failure mechanism before selecting a repair.
Should I inspect flashing after a storm?
You can look from the ground for obvious changes and check indoors for new moisture, but do not climb onto the roof. If you see damage or notice a leak, record what is visible and arrange a professional assessment.
Get a clear assessment of the roof detail
Flashing is a small part of a roof system with an important job: helping water pass vulnerable transitions without entering the home. When a leak or visible change raises concern, a careful inspection can distinguish a flashing problem from other possible causes and explain the available options. North Florida homeowners can contact North Wood’s Roofing for an honest evaluation and a clear next step.